

How to Make a Photo Look Professional
Learn how to make a photo look professional with expert tips on composition, camera settings, and editing. Transform your images from snapshots to masterpieces.
Table of Contents
It’s a common myth that you need a fortune's worth of expensive gear to take professional-looking photos. The truth? It’s far more about mastering a few core principles than it is about the camera you own. What truly separates an amateur snapshot from a professional photograph comes down to three things: thoughtful composition, deliberate lighting, and polished post-processing.
If you learn to control how you frame your subject and use the light around you, you’ll be amazed at the compelling images you can create before you even think about editing.
The Blueprint for a Professional Photo

Many photographers starting out believe the secret to stunning images is a high-end camera or a pricey subscription to editing software. And while those tools certainly don't hurt, the real foundation of a great photo is built before you ever press the shutter.
The biggest leap you can make is learning to see the world like a photographer. It’s a shift from just pointing your camera at something interesting to intentionally building a picture. You stop being a passive observer and start designing a visual experience.
Before we dive deep, here's a quick look at the core pillars that create a professional photo. Think of this as your cheat sheet for what to look for every time you raise the camera to your eye.
Quick Guide to Professional Photo Elements
| Element | Key Objective | Simple Technique to Try |
|---|---|---|
| Composition | To guide the viewer's eye and create visual harmony. | Place your subject off-center, along one of the imaginary lines from the Rule of Thirds. |
| Lighting | To shape the subject, set the mood, and add dimension. | Shoot during the "golden hour" (just after sunrise or before sunset) for soft, warm light. |
| Focus | To ensure the most important part of the image is sharp. | Use your camera's single-point autofocus to select your subject's eye in a portrait. |
| Color | To evoke emotion and create a cohesive look. | Find a color palette with just 2-3 dominant colors for a more unified and less distracting image. |
These elements are the building blocks. Once you start consciously thinking about them, you'll see a dramatic improvement in your work.
The Power of Strong Composition
Composition is just a fancy word for how you arrange everything in your frame. A professional photo uses this arrangement to tell the viewer where to look, creating balance and a clear sense of purpose. It’s the visual grammar of your image.
A few simple guidelines can have a huge impact:
The Rule of Thirds: This is the classic for a reason. Imagine a tic-tac-toe grid over your screen. Instead of sticking your subject in the dead center, place them along one of the lines or where the lines intersect. It instantly makes the photo feel more dynamic.
Leading Lines: Look for natural lines in the scene—a road, a fence, a shadow, a river—and use them to point the viewer's eye toward your subject. This is an incredibly powerful way to create a sense of depth and guide the narrative.
Framing: Use elements in the foreground to create a natural frame around your subject. Think of shooting through a doorway, under an arch, or between tree branches. This adds context and helps isolate your main point of interest.
These principles are absolutely crucial in portrait work. To see just how much composition matters, our guide on what makes a good headshot shows how it directs all the attention right where it belongs: the subject's expression.
Understanding and Using Light
If composition is the grammar, then light is the language itself. It's arguably the single most critical element in photography. Light sculpts your subject, sets the mood, and ultimately determines the technical quality of the shot. Experienced photographers don't just hope for good light; they actively chase it down or create it themselves.
The word "photography" literally means "drawing with light." Without understanding light, you are working with only half the tools available to you. Mastering it is non-negotiable for professional results.
Start by simply observing the light around you. Is it hard or soft? Hard light, like the direct sun at high noon, creates sharp, dark shadows and intense contrast. It can be dramatic, but it's often harsh and unflattering for people.
Soft light, on the other hand, is your best friend. You'll find it on an overcast day, in the shade, or near a large window. It wraps gently around your subject, creating smooth tones and minimizing distracting shadows. This is exactly why photographers rave about the "golden hour"—that magical time right after sunrise or before sunset. The light is soft, warm, and angled low in the sky, adding gorgeous dimension to almost any scene.
Dialing In Your Camera Settings
If you think of composition and light as your ingredients, then your camera settings are the recipe. The single biggest leap you can take toward professional-looking photos is getting your camera off "Auto." It's the difference between letting your camera guess what you want and telling it exactly what to do.
This all comes down to mastering the exposure triangle: aperture, shutter speed, and ISO. These three settings are in a constant dance to control the brightness of your image, but each one also brings its own creative flair to the party.
Create Dreamy Backgrounds with Aperture
Aperture is your key to unlocking that gorgeous, blurry background—what photographers call bokeh. Measured in f-stops (like f/1.8 or f/8), aperture controls how much of your photo is in focus.
A low f-stop number, like f/1.8 or f/2.8, means the lens opening is wide, creating a shallow depth of field. This is the magic trick for making your subject pop. They stay tack-sharp while the background just melts away into a beautiful, soft blur. It's a go-to for portraits. On the flip side, a high f-stop, like f/11 or f/16, keeps everything sharp from front to back, which is exactly what you want for those epic landscape shots.
My Advice: Try switching your camera to Aperture Priority mode (you'll see it as "A" or "Av" on the dial). This is a fantastic middle ground. You pick the f-stop to get the creative look you want, and the camera handles the shutter speed to get the exposure right. It's the best way to start taking back control.
This image shows a classic portrait setup where the camera settings are working in perfect harmony with the lighting to create that polished, professional look.
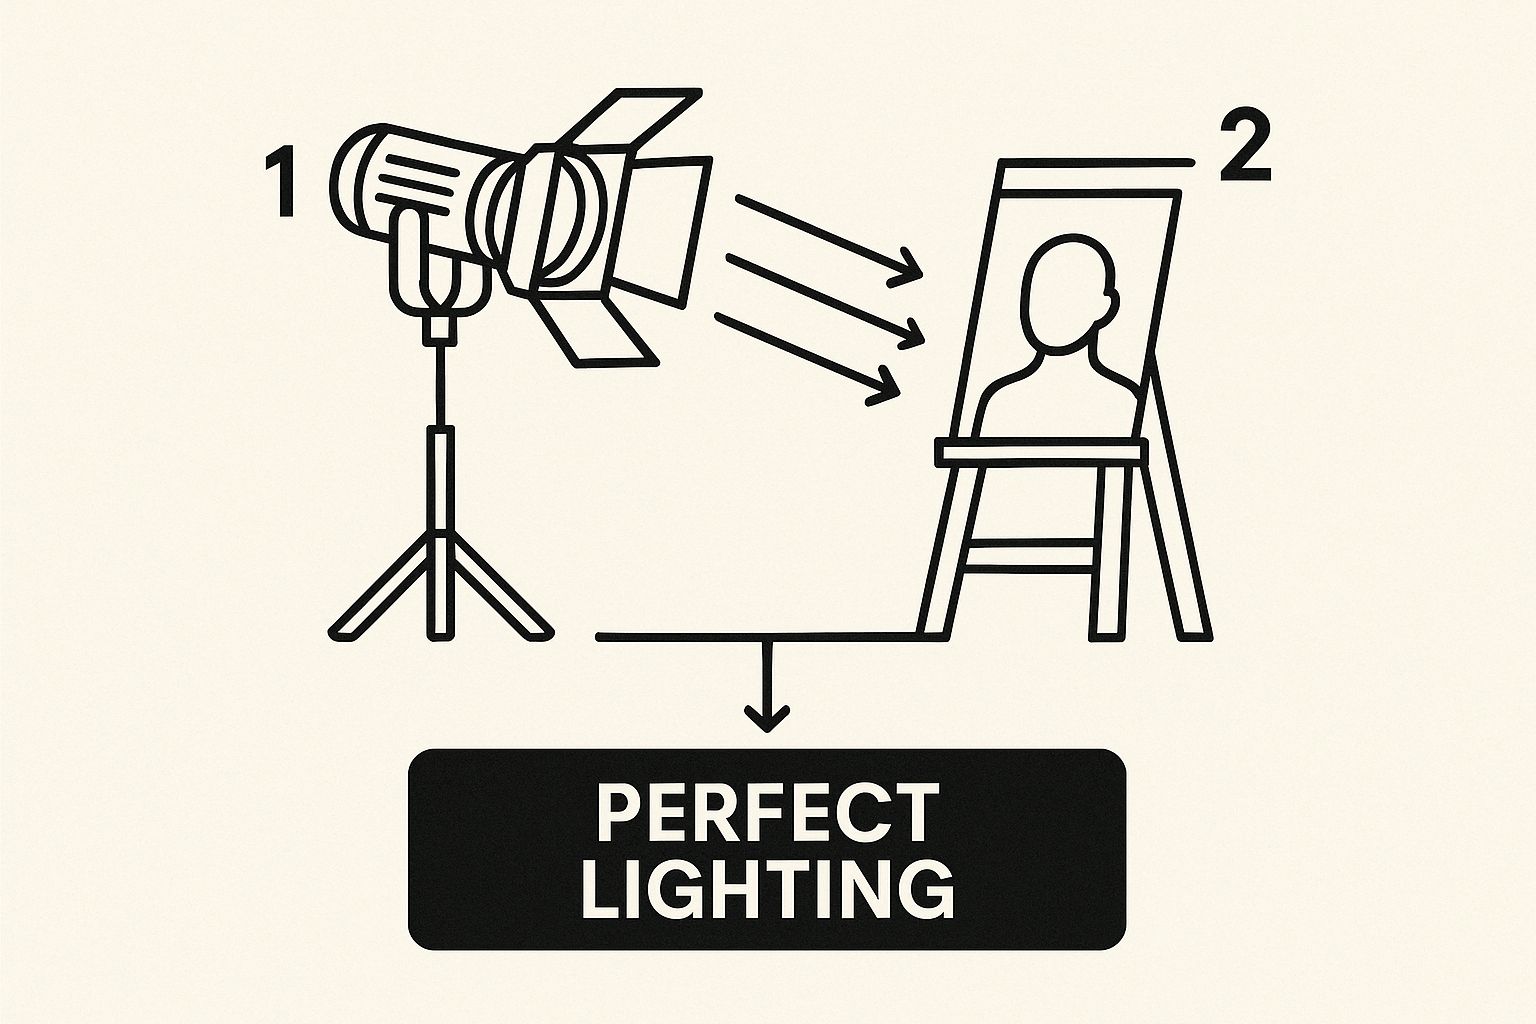
As you can see, understanding how your settings interact with light is the foundation of a studio-quality shot.
Control Motion with Shutter Speed
Shutter speed is all about time—specifically, how long your camera's sensor sees the light. Its real creative power, though, is in how it handles motion.
Fast Shutter Speed (e.g., 1/1000s): Want to freeze a moment in time? This is how you do it. Think of capturing a bird mid-flight or an athlete frozen in action. The faster the shutter, the crisper the detail.
Slow Shutter Speed (e.g., 1/15s or longer): This is where you get creative with blur. You can transform car headlights into long, glowing streaks or make a waterfall look like silky, smooth cotton. Just remember, for this to work without the whole photo becoming a blurry mess, you'll absolutely need a tripod.
Getting these settings right is vital, especially when you're crafting a specific look in a controlled environment. If you're looking to perfect your portrait game, we have a complete guide on professional headshot lighting setups that goes into much more detail.
Manage Light Sensitivity with ISO
Think of ISO as your camera's sensitivity to light. On a bright, sunny day, you'll want to use a low ISO, somewhere between 100 and 400. This gives you the cleanest, most detailed images possible, with zero distracting grain.
But what happens when the light fades? You'll need to increase the ISO to get a properly exposed photo. Here's the catch: pushing the ISO too high (like 3200 or 6400) introduces digital noise, or grain, which can quickly make a great photo look amateur. Your goal should always be to keep your ISO as low as the light will let you. It’s a simple rule that makes a huge difference in image quality.
Polishing Your Photos with Post-Processing
Getting a great shot straight out of the camera is a huge part of the puzzle, but the real magic often happens in post-processing. Editing isn't about faking a good photo. It’s about taking the raw potential you worked hard to capture and giving it that final polish—the kind that makes an image look clean, intentional, and professional.
Think of it like a chef meticulously plating a dish. All the right ingredients are there, but the final presentation is what elevates the entire experience. Your goal is to refine, not completely reinvent.
Start with the Essential Adjustments
Before diving into creative effects or filters, you have to build a solid technical foundation. Every professional I know starts their editing workflow by correcting the basics. If you rush this part, the final result will always feel a little off, like a house built on a shaky foundation.
Focus on these three core adjustments right out of the gate:
Exposure: This is simply the overall brightness of your photo. If your image is a hair too dark or a touch too bright, a gentle nudge here is your first move. Just be careful not to push it too far, or you’ll start to lose crucial detail in the shadows or highlights.
Contrast: This slider controls the difference between the darkest and brightest areas of your image. Bumping up the contrast adds that "pop" and makes a photo feel more dynamic. Lowering it can create a softer, more muted, or even dreamy look.
White Balance: This is all about correcting the color temperature to make sure the whites in your photo actually look white. If you've ever had a picture come out with a weird yellow or blue tint, adjusting the white balance is what brings the colors back to being natural and true-to-life.
Once you have these fundamentals locked in, your image will already look significantly better. This clean base is absolutely essential before you start making more stylistic choices.
Shape the Mood with Color Grading
With the technical fixes out of the way, now you can get creative. This is where you inject your personal style and really start to guide how the viewer feels when they look at your photo. Color grading is the art of subtly shifting the colors in your image to create a specific mood or atmosphere.
For instance, slightly cooling down the tones and desaturating the colors can evoke a feeling of melancholy or calm, which works beautifully for moody landscapes. On the other hand, warming up the tones with subtle yellows and oranges can make a portrait feel incredibly inviting and cheerful. The key here is subtlety. A little really does go a long way.
A professional edit enhances the story the photo is already telling. It shouldn't create a new story altogether. Your edits should feel like a deliberate choice, not an accident or a heavy-handed filter.
Use Sharpening Strategically
Sharpening is that final touch that can make key details really stand out, but it's so easy to get wrong. The biggest mistake I see beginners make is applying a sharpening filter across the entire image. This almost always creates unnatural, crunchy-looking edges and just amplifies any digital noise.
Instead, learn to apply sharpening selectively. In a portrait, you might only want to sharpen the eyes, eyelashes, and lips to draw the viewer’s attention right where you want it. For a landscape, maybe you just sharpen the texture of the rocks in the foreground while leaving the soft clouds in the sky untouched. This selective approach adds a crisp, professional finish without making the whole photo look over-processed.
This level of precision is only getting easier with new tech. In fact, the global photographic services market is projected to hit around $64.68 billion by 2034, and a big driver of that is the rise of AI-powered editing tools that can automate complex tasks like selective sharpening and blemish removal. You can dig into the full research on photographic market trends to see just how much technology is shaping the industry.
Developing a Professional Photographer's Mindset
Having a great eye and mastering your camera settings will get you started, but it's the business mindset that truly separates the pros from the hobbyists. If you want to create consistently professional-looking photos, you have to start thinking like a professional first. This is about more than just taking pretty pictures; it’s about building a real, sustainable business around your passion.
Too many photographers find themselves bouncing from one gig to the next, which makes for a seriously unpredictable income. The real secret to stability isn't just booking more shoots—it's diversifying. A truly professional operation has several different ways of bringing in money, all working together.
Don't just box yourself into one type of session. A solid, diversified business could look something like this:
Client Shoots: This is your bread and butter, covering everything from family portraits to corporate work.
Event Coverage: Think weddings, corporate parties, and community events. These are often high-value jobs.
Print Sales: Turning your images into high-quality prints, canvases, or albums transforms your service into a tangible, premium product.
Stock Photography: Licensing your best work can create a nice stream of passive income that builds up over time.
Having this mix of income streams is your best defense against slow seasons and a fluctuating market. It’s what makes your business resilient.
Pricing Your Work for Its True Value
One of the biggest hurdles when going from amateur to pro is figuring out what to charge. It’s a tough transition. You're no longer just getting paid for your time; you're pricing your expertise, your gear, and the incredible value your final images deliver. With the cost of everything going up, underpricing is a one-way ticket to burnout.
Your prices need to cover the whole picture: the initial consultation, the shoot itself, your hours of editing, equipment upkeep, insurance, and marketing. You’re delivering a polished, final product, not just selling an hour of your day. For example, knowing how to pose for headshots is a specialized skill that adds massive value, and your pricing should absolutely reflect that.
A critical mindset shift is moving from, "How much is my time worth?" to "What is the value of this image to my client?" A fantastic headshot could help someone land their dream job. You can't put a price on that.
Maximizing Revenue with Smart Strategies
Just handing over a gallery of digital files is one of the fastest ways to devalue your work. A proven strategy for increasing what you earn on each job—and reinforcing the premium quality of your photography—is to change how you sell. Instead of lumping all the digital files into one flat-rate package, try offering print credits.
This simple change encourages clients to invest in beautiful, tangible products they can actually display. The data backs this up. Findings from the 2025 State of the Photography Industry report show that photographers who offer personal touches, like in-person viewing and ordering appointments, can see their revenue jump by up to 20%. And while 65% to 77% of photographers are dealing with rising business costs, print sales continue to be a major income driver for established pros. You can dig into more photography industry insights in the full Shootproof report.
This isn't just about making more money. It’s about ensuring your incredible images end up as art on a wall instead of getting lost on a hard drive. It's how you go from being just another photographer to becoming a trusted creative partner for your clients.
What “Professional” Looks Like Around the World
Ever notice how a photo that looks perfectly polished in one context can feel completely out of place in another? That’s because what we consider “professional” isn’t a universal standard. A style that wows an audience in Tokyo might not land the same way in New York.
This isn’t about losing your creative voice. It's about developing the versatility to tune your style for a specific audience, whether that’s a global corporation or a local boutique with an international clientele. Think of it as being visually bilingual—a skill that makes your work far more valuable.
Know Your Markets
Visual tastes are deeply rooted in culture. In some markets, commercial photography is all about high-energy, vibrant scenes. In others, a quieter, more minimalist aesthetic is the gold standard. Figuring out where your style fits best, or how to subtly pivot, gives you a serious edge.
The numbers tell a compelling story about where the demand is. The Asia-Pacific region is a behemoth, commanding a 35% share of the global photography services market, driven heavily by a taste for vivid and celebratory wedding photography.
Next up is North America, holding 28% of the market. This region is often defined by high consumer spending and an appetite for diverse, technically sophisticated imagery. Western Europe follows with a 20% share, known for its mature market that prizes high-fashion and clean, minimalist commercial work. If you're curious, you can dive deeper into photography industry statistics to see how these trends are playing out.
Fine-Tuning Your Style for a Global Audience
Adapting your work doesn't mean you have to reinvent yourself for every project. It's about making small, smart adjustments in how you shoot and edit.
Here’s a practical approach to aligning your work with international standards:
Study the local visual language. If you want to shoot for European fashion houses, immerse yourself in their lookbooks and campaigns. You’ll quickly notice the preference for muted color palettes, graceful compositions, and soft, natural light.
Rethink your color grading. For an event-focused project in the Asia-Pacific market, you might push your colors to be brighter and more saturated. The goal is to visually communicate energy and joy.
Adjust your composition. A clean, centered shot might be perfect for a North American tech company’s headshot. But a dynamic, off-center composition could be a much better fit for a lifestyle brand aiming for a more candid feel.
A truly professional photo isn’t just technically flawless; it speaks the right visual language. It feels right to the intended viewer. Developing that cultural awareness is what separates the good photographers from the great ones.
Your Top Photography Questions, Answered
Every photographer, whether they're just starting out or have been shooting for years, runs into the same handful of questions. Getting these sorted is often the quickest way to level up your work. Let's dive into some of the most common ones I hear.
So, what's the one camera setting that makes the biggest difference? If you master just one thing, make it Aperture Priority mode. This is your secret weapon for getting that dreamy, professional-looking blurred background (the "bokeh" everyone talks about).
It lets you take creative control of what's in focus by setting the aperture (f-stop), while the camera does the heavy lifting on the other exposure settings. It’s the fastest way to make your subject pop and look like the star of the show.
Can I Really Get Professional-Looking Photos With My Smartphone?
You absolutely can. What makes a photo look "professional" has everything to do with light, composition, and intention—not the brand of camera you're holding. The trick is to stop using your phone like a simple point-and-shoot.
Start thinking like a photographer. Hunt for good light, like the soft, flattering light from a window or the even tones you find in open shade. Turn on your phone’s gridlines and use them to compose your shot with the rule of thirds. And finally, get comfortable with a good editing app, like Lightroom Mobile or Snapseed.
The professional touch comes from thoughtful refinement, not slapping on a heavy filter. Your goal is to gently enhance the image by adjusting things like exposure, contrast, and color balance. It’s all about making the photo look clean and deliberate, proving the photographer's eye is always more important than the gear.
How Do I Know When I've Edited a Photo Too Much?
This is the classic dilemma, and the line between "just right" and "way too much" is all about subtlety. A great edit should feel invisible. It should make the photo look like the best possible version of what you saw in real life, not like a piece of digital art.
Here's a great rule of thumb I live by: edit the photo until you think it’s perfect, then pull back every major slider by about 10%. This little trick is amazing for saving you from yourself and keeping the final result looking natural.
You've definitely pushed it too far if you see:
Unnaturally vibrant colors that scream "digital" and distract from the subject.
Skin that looks waxy or plastic, with all the natural texture smoothed away.
Weird, glowing halos around edges, which is a classic sign of an overdone HDR effect.
Remember, the best edits support the story of the photo, they don't become the story. When people see your work, you want them to think, "Wow, what a great photo," not, "I wonder what filter they used." That’s the sweet spot.
Ready to create stunning, studio-quality images without ever picking up a camera? With YourAIPhotographer, you can generate unlimited professional headshots, social media content, and more in seconds. Experience the future of photography today!