

Dimensions of a Headshot: The Ultimate Guide for Perfect Photos
Learn the key dimensions of a headshot to ensure your photos look professional. Find expert tips on headshot size requirements and best practices.
Table of Contents
Getting your headshot dimensions right is one of those small details that makes a huge difference. Think of it as a digital handshake—it sets the tone for your entire professional profile.
For most online platforms, like LinkedIn, a square 1:1 aspect ratio is the gold standard. You'll want to aim for a minimum of 400 x 400 pixels to ensure it looks crisp. If you're going old-school with print, the classic 8x10 inch photo is still king, which means you'll need a much higher resolution file, typically around 2400 x 3000 pixels.
Why Your Headshot Dimensions Matter
Ever seen a profile picture that’s stretched, blurry, or weirdly cropped? It immediately undermines the person's credibility. That’s what happens when the dimensions are off. It’s the digital equivalent of showing up to an important meeting in a suit that’s two sizes too big.
Getting the size and shape right shows you care about the details. It signals professionalism before anyone even reads your bio or resume. It’s a subtle cue, but a powerful one.
First Impressions in a Digital World
Your headshot is often the very first time a potential client, recruiter, or collaborator "meets" you. It’s not just about looking good; it's about playing by the rules of the platform you're on.
Algorithms on sites like LinkedIn are designed to display images optimally, and profiles that follow the guidelines get a visibility boost. The numbers don't lie: LinkedIn profiles with a professional headshot get 21 times more views and 36 times more messages. Part of that success comes from simply using a clear, correctly-sized photo. For a deeper dive, check out these insightful headshot size statistics.
To really nail this, you only need to get a handle on three basic concepts:
- Pixels: The tiny dots that make up your digital image.
- Aspect Ratio: The shape of your photo, defined by the ratio of its width to its height.
- Resolution: How many pixels are packed into the image, which determines its clarity.
Getting these elements right is non-negotiable for anyone serious about their personal brand. A great photo sized incorrectly is a missed opportunity to connect with your audience and make the impact you deserve.
Once you understand these fundamentals, you can make sure your headshot is always working for you, not against you. If you're still on the fence, our guide on why professional headshots are a smart investment can show you just how much of an asset a polished image can be.
Getting to Grips with Pixels, Aspect Ratios, and Resolution
Before you can nail your headshot dimensions, you've got to understand what actually makes up a digital image. I like to think of these three concepts—pixels, aspect ratio, and resolution—as the DNA of your photo. They control its size, shape, and clarity, and getting them right is the secret to a polished, professional look everywhere you use your headshot.
The Building Blocks: Pixels and Aspect Ratio
Let’s start with pixels. These are the microscopic, single-color squares that come together to form your headshot. Think of them like tiny mosaic tiles. A photo that’s 400x400 pixels has 400 tiles across and 400 tiles down. The more pixels you pack in, the more detail you get, and the sharper your final image will look.
Next up is the aspect ratio, which is just a fancy way of describing the shape of your photo by comparing its width to its height. It doesn't tell you the actual size in pixels, just the rectangular shape.
- 1:1 is a perfect square. This is the go-to for most social media profile pictures, like on LinkedIn or Instagram.
- 4:5 gives you a vertical rectangle. It’s a classic portrait shape that you’ll recognize from a standard 8x10 inch printed photo.
- 16:9 creates a wide, horizontal rectangle. You'll see this used for things like website banners or YouTube video thumbnails.
Why Resolution is So Important
Finally, we have resolution, which is all about pixel density. This is where a lot of people get tripped up, because the rules are completely different for screens versus print. We measure it in PPI (Pixels Per Inch) for digital displays and DPI (Dots Per Inch) for anything printed.
For any headshot you plan to use on a screen—your website, email signature, or social media—72 PPI is all you need. It’s the long-standing web standard that keeps file sizes down so pages load quickly, while still looking perfectly crisp on a monitor.
But if you’re printing that headshot? It’s a whole different ballgame. For print, 300 DPI is the absolute minimum industry standard. Anything less, and your photo will come out looking blurry, pixelated, and just plain unprofessional.
Trying to print a 72 PPI image is a recipe for disaster. Once you get how pixels, aspect ratio, and resolution all work together, you'll be able to prep your headshot for any situation, knowing it will always look its absolute best.
Digital Headshot Dimensions for Online Platforms
Every online platform has its own playbook for images, and your headshot is no exception. If you upload a photo with the wrong dimensions, you're rolling the dice. The platform's automated system might awkwardly crop your face, stretch the image, or compress it into a blurry mess—none of which helps your professional brand.
Getting this right is all about control. For example, LinkedIn uses a circular frame for profile pictures. If you upload a standard rectangular photo, their software has to guess how to crop it, which could mean lopping off the top of your head. But if you give it a perfectly square image, you get to decide exactly how you’re framed.
Tailoring Your Headshot for Key Platforms
Think of it like this: a vertical portrait (say, a 4:5 ratio) looks fantastic on a company’s “About Us” page, but it won't fit neatly into the square profile picture slot on most social media sites. For those, a 1:1 ratio is king.
You have to match the headshot to the space it's going to live in. Here's a great visual breakdown of the most common aspect ratios you'll encounter.
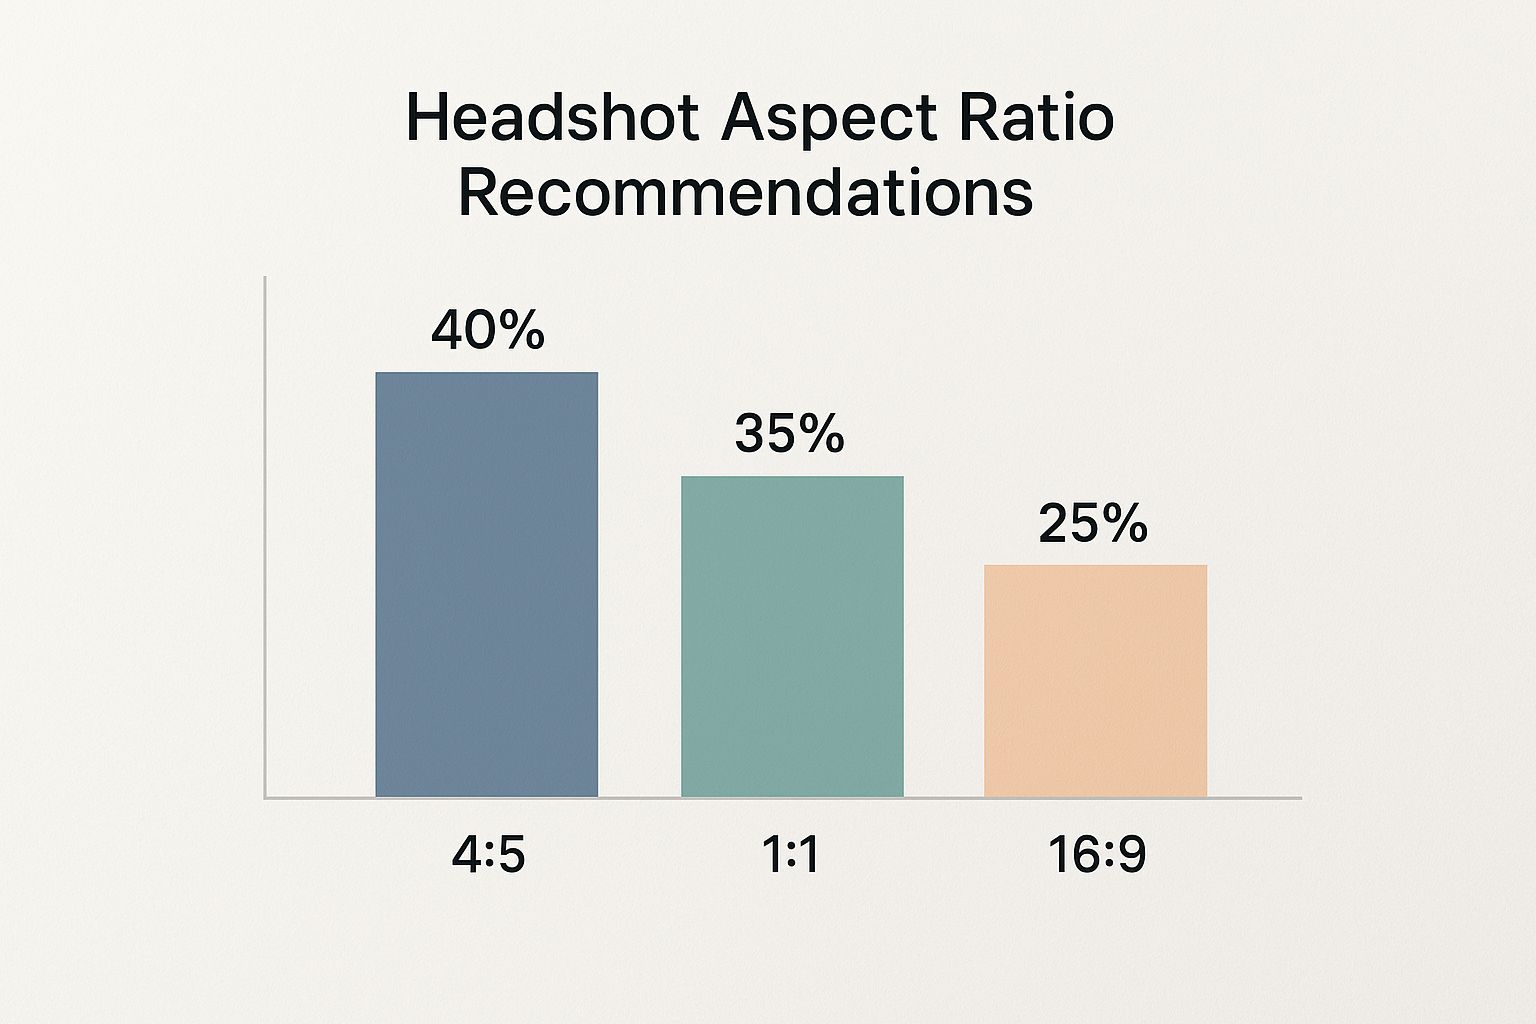
As you can see, the vertical 4:5 and the square 1:1 are the two heavy hitters. If you have versions of your headshot in both of these formats, you’ll be prepared for almost any scenario.
It's like having a suit tailored. You wouldn't wear the same outfit to a black-tie gala and a casual coffee meeting. Your headshot needs those same minor tweaks to look sharp and fit perfectly everywhere it appears online.
To make things simple, I've put together a quick cheat sheet with the go-to dimensions for the platforms where your headshot matters most.
Quick Guide to Digital Headshot Dimensions
This table breaks down the essential specs for the most popular professional platforms, so you can get it right every time without having to guess.
| Platform / Use Case | Recommended Pixel Dimensions (Width x Height) | Required Aspect Ratio | Key Tip |
|---|---|---|---|
| LinkedIn Profile | 400 x 400 pixels (minimum) | 1:1 (Square) | Upload a larger square image (e.g., 800x800) for better quality. The circular frame works best with a centered subject. |
| Corporate Website | 800 x 1200 pixels | 2:3 or 4:5 (Vertical) | Vertical formats are standard for "About Us" pages, as they frame the head and shoulders naturally. |
| Social Media | 1080 x 1080 pixels | 1:1 (Square) | A high-resolution square image works universally across Instagram, X (formerly Twitter), and Facebook profile pictures. |
| Email Signature | 150 x 150 pixels | 1:1 (Square) | Keep the file size small to ensure emails load quickly, but maintain a square shape for a clean, professional look. |
Bookmark this guide or save these numbers. Taking a few extra seconds to crop and export your headshot correctly ensures you always look polished and professional, no matter where people find you.
Print Headshot Dimensions for Physical Media
Even with everything going digital, a classic printed headshot still carries a lot of weight. Actors, models, speakers—they all know the power of leaving a physical photo behind. But getting your headshot from screen to paper is a whole different ballgame. Forget about pixels for a moment; now we're talking about inches and print quality.
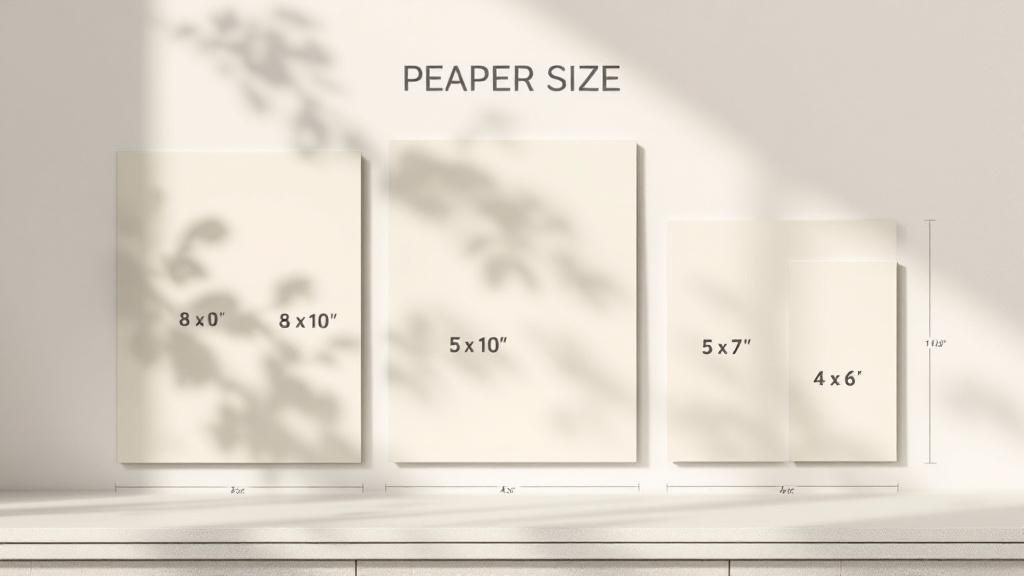
The undisputed champion of the printed headshot world is the 8x10 inch format. It's been the industry standard forever, and for good reason. It’s large enough to grab attention but compact enough to slide into a portfolio or press kit without a fuss.
You'll also see the 5x7 inch size pop up quite a bit. Think speaker bios at conferences or smaller inserts in company brochures. It's a great option for less formal situations where a full 8x10 might be overkill.
The Non-Negotiable Rule of 300 DPI
Here’s the single most important thing to remember for printing: resolution. We measure this in DPI, or Dots Per Inch. For a headshot to look crisp and professional in print, you absolutely must use a resolution of 300 DPI. No exceptions.
I can't tell you how many times I've seen people send a low-resolution web photo to a printer. The result is always the same: a blurry, pixelated mess that looks incredibly unprofessional. Always, always create a separate high-resolution file just for printing.
Think of it like this: a 72 DPI image is fine for a computer screen because the light from the monitor helps fill in the gaps. But on paper, those gaps just look like a blurry disaster. A 300 DPI image packs the ink dots so tightly together that the human eye sees a sharp, seamless photograph.
Converting Inches to Pixels
So, how do you make sure your digital file is ready for the printer? You just need to do a little math. Simply multiply the print size you want (in inches) by the required DPI.
Here’s the breakdown:
- For an 8x10 inch print: 8 inches x 300 DPI = 2400 pixels wide, and 10 inches x 300 DPI = 3000 pixels tall. Your final file needs to be 2400 x 3000 pixels.
- For a 5x7 inch print: 5 inches x 300 DPI = 1500 pixels wide, and 7 inches x 300 DPI = 2100 pixels tall. That means your file should be 1500 x 2100 pixels.
These standards have been around for a long time because they strike the perfect balance between impact and practicality. Of course, the numbers are just one part of the equation. What's behind you in the photo matters just as much, so be sure to check out our guide on choosing the best headshot backgrounds to pull your entire look together.
Common Headshot Cropping and Resizing Mistakes
Knowing the right dimensions for your headshot is one thing, but getting your photo to fit those specs without wrecking it is a whole different ballgame. It’s surprisingly easy for a few well-meaning clicks to completely undermine a great picture.
One of the most common blunders I see is force-stretching an image. Let's say you have a rectangular photo but need a square one for your profile. The absolute worst thing you can do is just drag the sides to make it fit. This warps your features and instantly screams "amateur." The right way is to crop it, which trims the photo down without distorting you.
Another frequent misstep is just plain awkward cropping. You’ve got to give your headshot some breathing room.
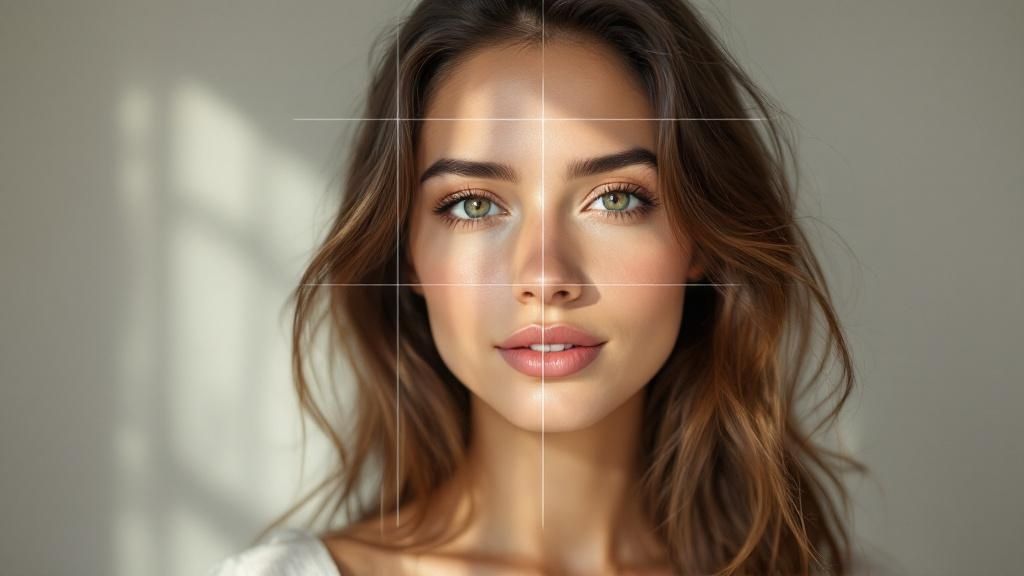
Framing and Composition Errors
A bad crop can sabotage a perfectly good photo. The whole point is to create a balanced look that naturally guides the viewer's eye to your face, not to the weird framing.
Here are a few classic cropping mistakes to steer clear of:
- Cutting Off the Top of Your Head: This makes the photo feel tight and claustrophobic. You always want to leave a little bit of intentional space above your hair.
- Too Much Headroom: On the flip side, leaving a giant empty space above your head can make you look small and unimportant in your own photo.
- Cropping Too Tightly: A super-tight crop that’s just your face can feel a little intense, even confrontational. It’s almost always better to include at least the tops of your shoulders for a more relaxed, approachable look.
Think of your headshot frame like a personal space bubble. You want it close enough to feel connected but with enough room to feel comfortable and confident. The right crop respects that space.
Finally, a word of warning: never, ever try to enlarge a small, low-resolution photo. You simply can't add detail that isn't there. Trying to blow up a small file will just get you a blurry, pixelated mess. Always start with the largest, highest-quality version of the photo you have.
Remember, the way you frame your shot is just as important as your expression. For more on that, be sure to check out our guide on how to pose for headshots.
Your Top Questions About Headshot Sizes, Answered
 Even with all the rules memorized, things can get a little fuzzy when it's time to actually export your final image. Let's clear up some of the most common questions that pop up right when you're about to hit "save."
What Is the Best Single File to Get from My Photographer?
Always, always ask for the highest-resolution, uncropped digital file they can give you. This is your "master" copy, the digital negative from which all other versions will be created.
A big, beefy source file—something like 3000x4000 pixels at 300 DPI—gives you the ultimate freedom to crop and resize for any purpose later on. You can easily make a big image smaller, but you can't make a small image bigger without it looking blurry and unprofessional.
Can I Use My LinkedIn Headshot for Printing?
Definitely not. It's tempting to grab the image you already have uploaded, but your LinkedIn photo is a low-resolution (72 PPI) file that’s been squashed down for fast web loading. It's built for screens, not paper.
For anything you print, you need a high-resolution (300 DPI) file. It will typically be a classic rectangular shape, like an 8x10. If you try to print your web photo, the result will be a pixelated mess. Always go back to that high-res master file to create a separate version just for printing.
Think of it this way: creating platform-specific versions of your headshot isn't just a "nice to have"—it's a must for looking polished and professional everywhere you appear. One size rarely fits all.
Does the File Type Affect Dimensions?
Nope! The file format itself—whether it’s a JPEG, PNG, or TIFF—doesn't change the pixel dimensions of your headshot. What it does change is file size, image quality, and special features like transparency. Each one has a specific job.
- JPEG (.jpg): This is your go-to for almost all online uses. It hits the sweet spot between good quality and small file size, so your website and social profiles load quickly.
- PNG (.png): Pick this format when you need a transparent background. It’s perfect for layering your headshot over a colored banner on your website without a clunky white box around it.
- TIFF (.tif): This is the gold standard for your master file and for high-quality printing. It's a "lossless" format, meaning it holds onto every last bit of image data without any compression.
How Do I Check My Headshot Dimensions?
You don't need any fancy software to do this. Checking an image's properties is simple on any computer and is the best way to confirm its size and resolution before you upload.
On a Windows PC, just right-click the file, choose "Properties," and click the "Details" tab. If you're on a Mac, right-click (or Control-click) the file and select "Get Info." A window will pop up showing you the exact pixel dimensions and resolution.
Stop wrestling with complicated photo editing software. With YourAIPhotographer, you can generate perfectly sized, professional-quality headshots in seconds. Get started today and create stunning images for every platform.