

How to Make AI Images of Yourself: Quick & Easy Guide
Learn how to make AI images of yourself with simple tips on photo selection and prompting. Create stunning AI self-portraits today!
Table of Contents
So, what does it actually mean to make an AI image of yourself? It all boils down to using a specialized tool, like YourAIPhotographer, to train a personal AI model on a handful of your own selfies. Once it learns your face, you can generate studio-quality photos in literally any style you can dream up—all by just typing a description. It's a complete game-changer for your digital presence, no camera required.
The New Frontier of AI Self-Portraits
Welcome to the fascinating world of AI self-portraits, a space where your own photos become the raw material for incredible digital art. Just a few years ago, getting a professional headshot or a creative portrait meant booking a photographer, scouting locations, and spending a fair bit of time and money. Now, generative AI puts that same power right at your fingertips.
This isn't some niche hobby, either. The technology has absolutely exploded in popularity since 2022. An estimated 34 million AI-generated images are now created every single day across various platforms. Think about that. Out of the 15 billion AI images created so far, a huge number were made with the same core technology we're about to use. It’s a massive visual shift, and you’re about to be a part of it.
Why Should You Care?
The idea behind it is surprisingly straightforward but incredibly powerful. You just feed a set of your own pictures to an AI, which then learns to recognize your unique facial features. After it builds this digital model of you, it can drop your likeness into pretty much any scenario you can imagine. This unlocks a universe of creative possibilities that used to be completely out of reach.
So, what can you actually do with this?
- Create Professional Headshots: Need a new LinkedIn photo? Generate a dozen polished, professional-looking options without leaving your desk.
- Reimagine Your Look: Ever wonder what you'd look like with a different haircut, a bold outfit, or as a character in a Renaissance painting? Now you can find out.
- Make Your Content Pop: Design one-of-a-kind images for your social media, blog, or personal website that will make people stop scrolling.
The real magic here is that AI photography separates your likeness from a single moment in time. You’re not just capturing a photo; you’re creating a flexible, digital version of yourself that can be placed in any context, style, or setting imaginable.
This guide is going to walk you through exactly how to do this with YourAIPhotographer. You don't need any special skills or fancy gear—just a few of your favorite selfies. If this is all new to you, checking out our guide on how AI is used in photography can give you some great background.
Ready? Let’s get started.
How to Prepare Your Photos for the Best AI Results
The quality of your AI portraits hinges entirely on the photos you feed the system. Think of it as teaching the AI who you are—if you give it blurry, low-light, or nearly identical photos, it’s going to have a hard time learning your features. This is often why people get distorted or generic-looking results.
But when you upload a sharp, diverse set of images, you give the AI everything it needs to understand your unique facial structure, expressions, and nuances. Taking a few extra minutes to get this part right is the single most important step in creating AI images of yourself that you’ll actually love and want to use.
The Art of Choosing the Right Photos
Variety is everything. The AI needs to see your face from different angles, in various lighting setups, and with a range of expressions to build an accurate digital model of you. One of the most common mistakes I see is people uploading 10-15 selfies all taken from the same high angle. That just doesn't give the AI enough data to work with.
You’re essentially creating a small dataset of you. You want it to be well-rounded and comprehensive.
This visual guide quickly sums up the ideal workflow for getting your photos ready.
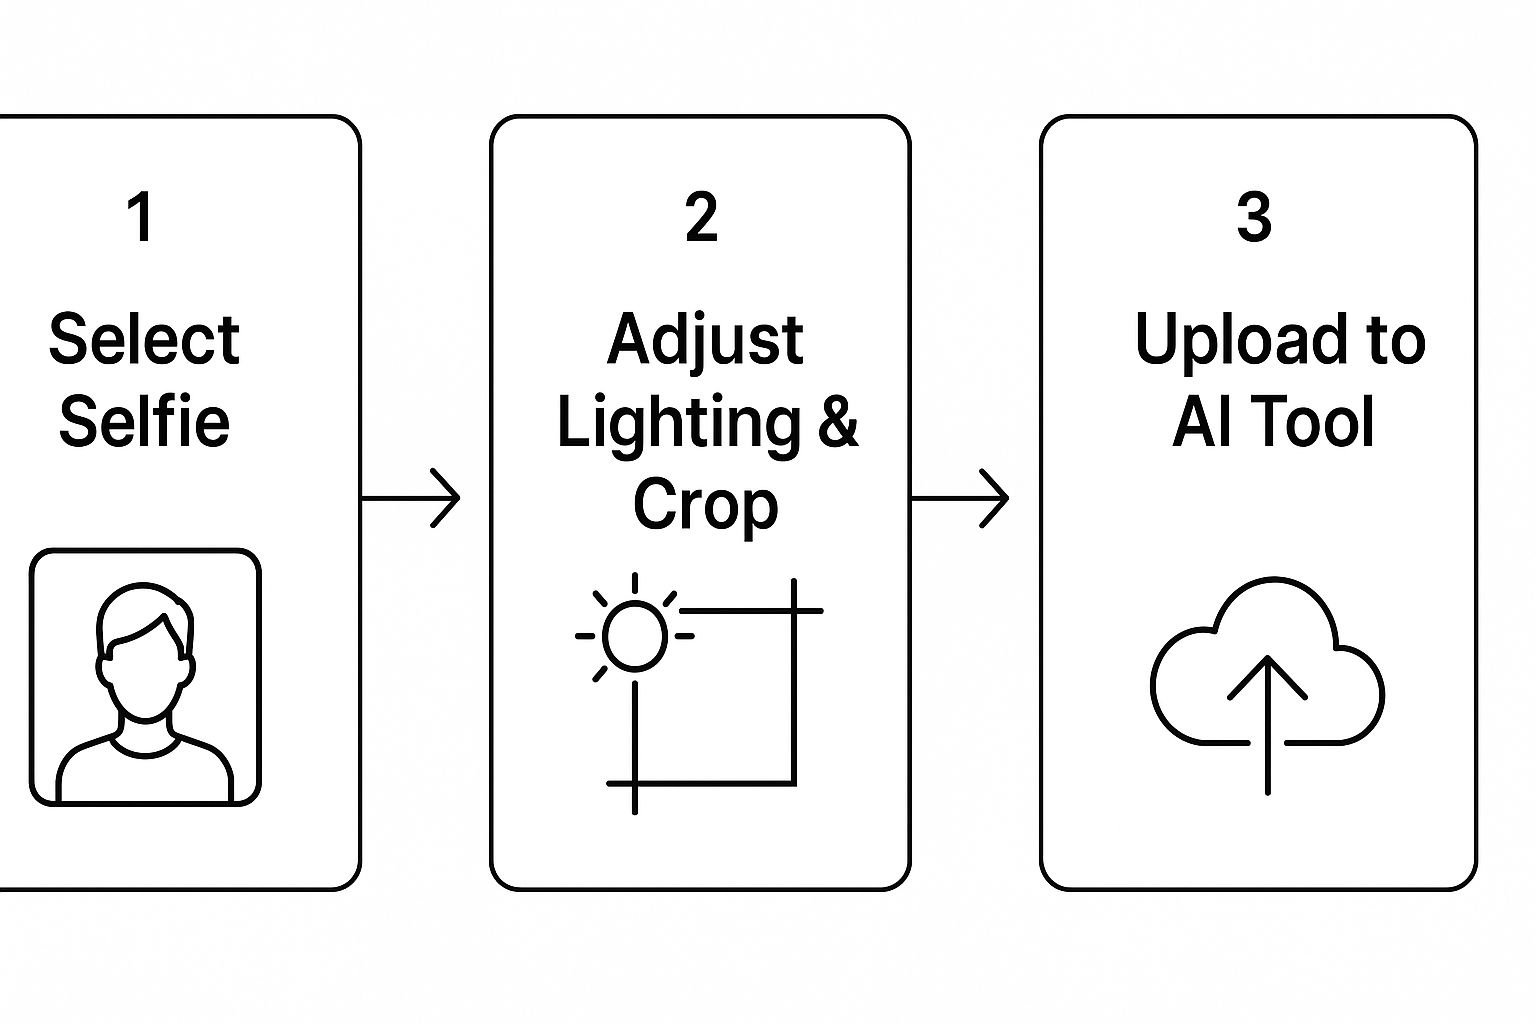
As you can see, it’s not just about dumping a bunch of pictures into the tool. It's a thoughtful selection process that sets the stage for success.
Your Go-To Photo Guidelines
To make things crystal clear, here are the specific criteria your photos should meet. Stick to these, and you'll see a massive improvement in your results.
- Mix Up Your Angles: You need a good mix of shots. Include some close-ups (just your face), some half-body shots (from the chest or waist up), and a couple of profile views. This combination helps the AI grasp your facial proportions from all sides.
- Show a Range of Expressions: Don't just give it the same closed-mouth smile in every picture. Upload photos where you’re smiling wide, looking serious, laughing, or just neutral. This teaches the AI how your face shifts with different emotions, which leads to far more dynamic and believable portraits.
- Good Lighting is Non-Negotiable: Natural, soft light is always best. Try to avoid photos with harsh shadows cast across your face, strong backlighting that blows out your features, or direct, unflattering sunlight. The AI needs to see your features clearly, not guess what they look like. If you're struggling with this, our guide on how to take your own headshot has some great lighting tips you can use.
- Keep Your Face Clear: Make sure your face is unobstructed. Sunglasses, hats, or even your hands covering your mouth or eyes can confuse the AI. It’s crucial that your entire face, especially your eyes, is visible in the majority of your photos.
To help you get this right every time, here’s a quick checklist to run through before you upload your images.
Photo Selection Checklist for Optimal AI Training
This table is a handy reference to make sure you're choosing photos that will give the AI the best possible information to work with.
| Guideline | Why It Matters | Example |
|---|---|---|
| Include 3+ Close-Ups | Teaches the AI the fine details of your facial features. | A clear photo of just your head and shoulders, looking at the camera. |
| Include 3+ Half-Body Shots | Provides context for your proportions and body type. | A picture of you sitting at a desk or standing against a wall. |
| Vary Your Expressions | Allows the AI to generate more dynamic and emotional portraits. | One photo smiling, one serious, one laughing. |
| No Sunglasses or Hats | The AI needs to see your full face, especially your eyes and hairline. | A photo taken outdoors without any accessories blocking your face. |
| Avoid Heavy Filters | Filters alter your natural features and can lead to inaccurate results. | Use original, unedited photos directly from your phone's camera roll. |
| Solo Shots Only | Group photos can confuse the AI about which person to focus on. | A picture of you alone, without other people, pets, or faces nearby. |
Following these simple rules ensures you're giving the system a clean, diverse, and clear dataset. Every photo is a piece of the puzzle. The better the pieces, the more impressive the final picture will be.
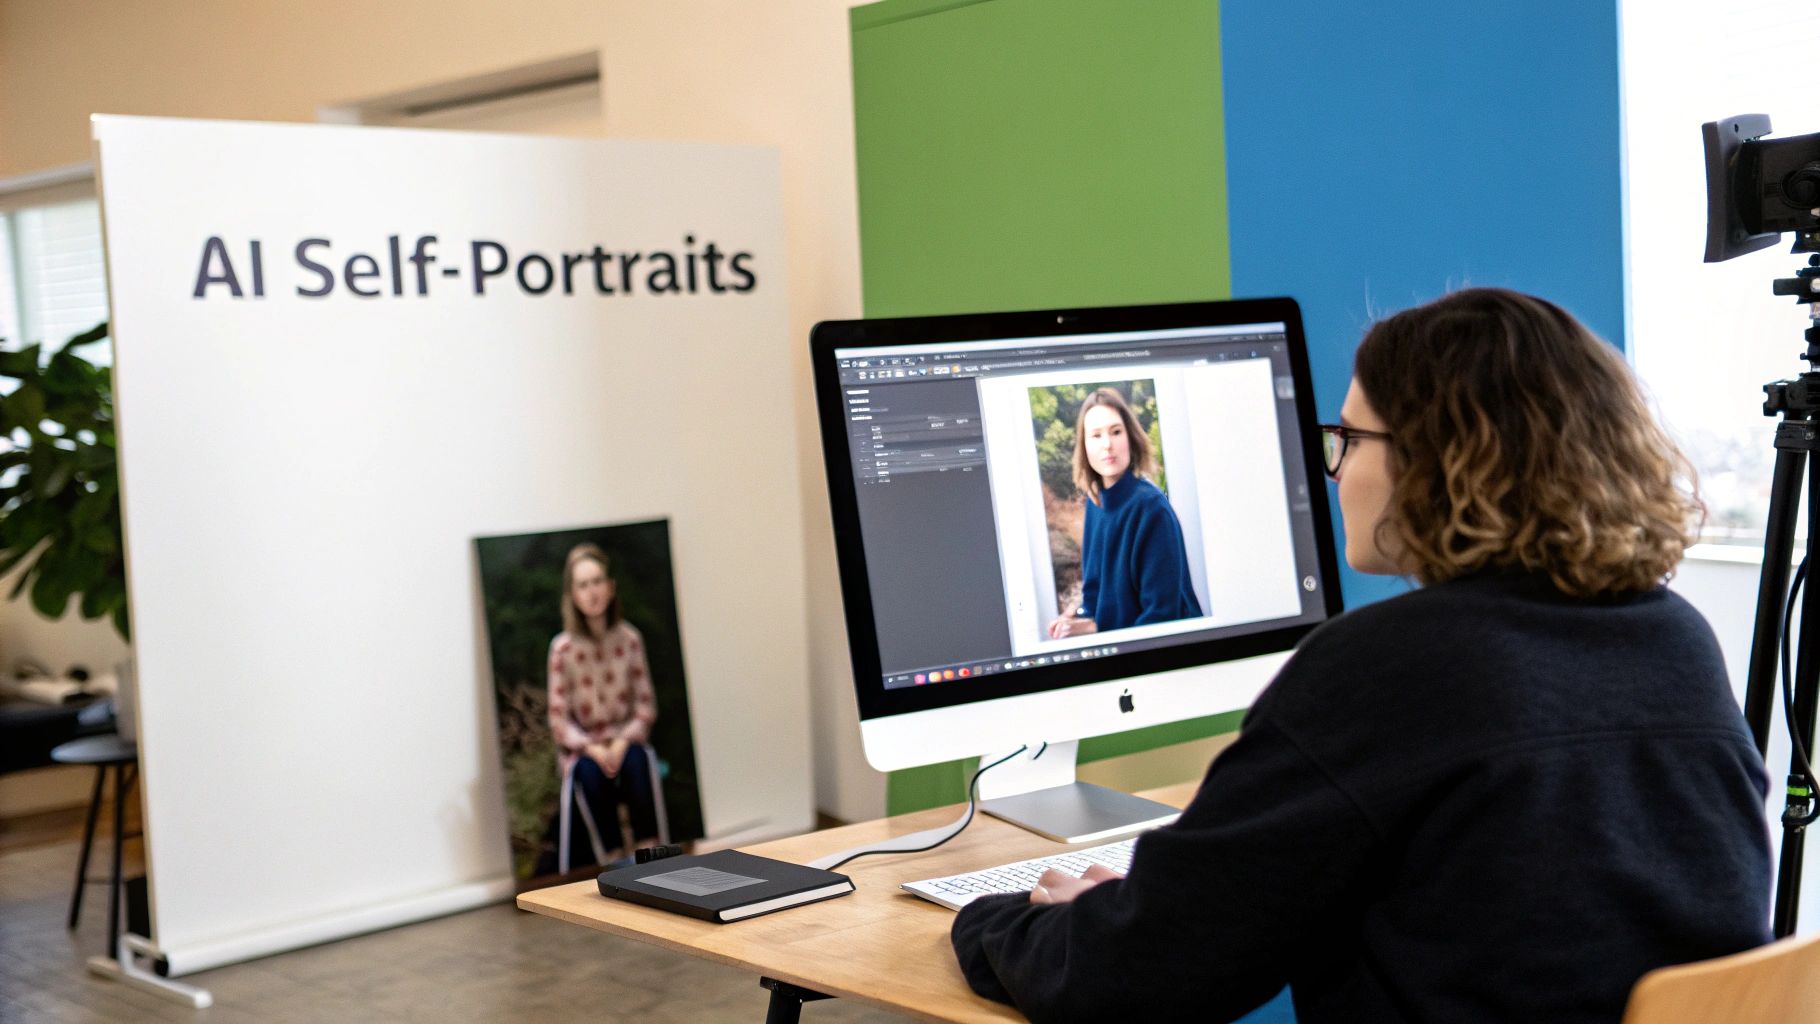
Your First AI Image Generation Walkthrough
Alright, you’ve gathered your photos, and now it's time for the magic to happen. This is where you hand things over to YourAIPhotographer and let it get to work training your personal AI model.
What’s actually going on behind the scenes is pretty incredible. The platform isn’t just looking at your pictures; it’s learning the unique contours of your face, your typical expressions, and how light hits you from different angles. This training process usually takes about 20-30 minutes. When it's done, the AI has built a sophisticated digital version of you, ready to be placed in any scene you can dream up.
Writing Your First Prompts
Once the training wraps up, you get to step into the role of art director. Your main tool? The text prompt. This is your direct line to the AI, where you'll describe exactly what kind of image you want to create.
Think of it as giving instructions to a painter. The words you choose will guide every brushstroke. When you're just starting, it's a good idea to keep things simple and clear. A great prompt usually has a few key ingredients.
Here’s a breakdown of the essential parts of a solid prompt:
- The Subject: This is you! The model is already trained on your face, so this part is easy.
- The Action: What are you doing? Are you smiling at the camera, looking off into the distance, or striking a particular pose?
- The Outfit: Get descriptive here. Instead of just "a suit," try "a dark navy blue business suit with a crisp white shirt." The more detail, the better.
- The Scene: Where are you? A "modern office with large windows" or "a serene forest at sunrise" sets the stage.
- The Style: This is the aesthetic. Are you going for "photorealistic," "an oil painting," or maybe something with "cinematic lighting"?
My Two Cents: Don't hold back on the details. The more specific you are in the prompt, the more control you have over the final image. This is what turns a generic AI photo into a genuinely impressive, personalized portrait.
For instance, a beginner might type: "A professional headshot."
But a much more effective prompt would be: "Photorealistic headshot of me in a charcoal gray blazer, smiling confidently, against a blurred, modern office background with soft, natural lighting." See the difference? That level of detail gives the AI a clear roadmap, and the results are almost always far more accurate.
Creative Prompt Examples to Spark Ideas
Now that you've got the basics down, let's have some fun. The real power of this tech is its creative flexibility. If you want to see what other platforms are capable of, it's worth checking out some of the best AI portrait generators on the market.
To get your own ideas flowing, here are a few prompts I’ve used that you can tweak for yourself.
For a Polished, Professional Look
- Prompt: “Corporate headshot of me wearing a tailored black suit and a light blue tie, professional smile, set against a minimalist gray studio background, cinematic lighting.”
- Why it works: This is a classic for a reason. It nails down the attire, expression, setting, and lighting style—everything you need for a sharp LinkedIn profile picture.
For an Artistic Vibe
- Prompt: “An impressionist oil painting of me, looking thoughtfully out a window on a rainy day, soft and muted color palette, painted in the style of Monet.”
- Why it works: It clearly states the medium (oil painting), the mood (thoughtful, rainy day), and even a specific artist to mimic. This gives the AI a ton of creative direction.
For Something Totally Out There
- Prompt: “Me as an astronaut floating in space, Earth visible in the background, hyper-realistic, 8k resolution, cinematic lighting reflecting off the helmet visor.”
- Why it works: This prompt builds an entire scene from scratch, adding technical details like "8k resolution" and visual cues like the reflection on the helmet to push the AI toward a high-quality, imaginative result.
Use these as a starting point and start experimenting. Swap out the clothes, play with the lighting, or drop yourself into a different century. Every new prompt is a chance to create something unique.
Advanced Tips for Crafting Unique AI Portraits
https://www.youtube.com/embed/bIxbpIwYTXI
Once you’ve run your first few batches of images, you’ll probably start wanting more control. This is where the real fun begins. Going beyond the basic prompts is how you start to refine the output, fix those weird AI quirks, and create portraits that look polished and genuinely unique.
The trick is to start thinking like a photographer directing a shoot. The AI can be incredibly literal, so the more specific you are with your instructions, the better it can bring your vision to life. It's less about simple descriptions and more about learning the art of the prompt.
Mastering Negative Prompts
One of the most powerful tools you have is the negative prompt. This is where you tell the AI what you don’t want to see. AI models are notorious for adding strange artifacts—extra fingers are a classic, but you also see distorted text or unnatural features. A negative prompt is your secret weapon for cleaning these issues up before they even happen.
For instance, maybe your portraits have a slightly plastic, almost airbrushed look. You can use a negative prompt to steer the AI away from that.
Here's how to use them effectively:
- For Better Realism: If you're getting that uncanny valley vibe, try adding
blurry background, unrealistic, plastic skin, poorly drawn handsto your negative prompt. This pushes the AI away from common digital flaws and toward more photorealistic textures. - For Tighter Composition: Is the AI constantly cropping the shot in an awkward way? Add
cropped head, bad framing, poorly composedto guide it toward a more professional-looking composition. - To Ditch Unwanted Objects: Sometimes the AI gets a little too creative. If you asked for an "office background" and it threw in a bizarre-looking lamp, just add
lamp, strange decorto the negative prompt on your next go.
Think of negative prompts as a creative tool, not just an error-fixer. By telling the AI what to subtract, you're giving it clearer boundaries. Ironically, this often leads to more creative and accurate results within those defined limits.
It’s a bit like sculpting. You're not just adding clay; you're also carving away the pieces that don't belong to reveal the final piece.
Blending Styles and Controlling Weights
Ready to get a little more sophisticated? You can actually blend different artistic styles or concepts in a single prompt. This is usually done by combining descriptions and, in some systems, using numerical "weights" to tell the AI which element is more important. While YourAIPhotographer simplifies the process, understanding the core idea will help you write much stronger prompts.
Let's say you want a portrait that's mostly a photograph but has a hint of watercolor in the background.
You could try a prompt like: "Photorealistic portrait of me in a cafe, with subtle watercolor painting aesthetics in the background."
This simple instruction tells the AI to prioritize the photorealistic you while applying the artistic style more gently to the surroundings. Here, the word "subtle" acts as a natural way to control the "weight" or influence of the watercolor style.
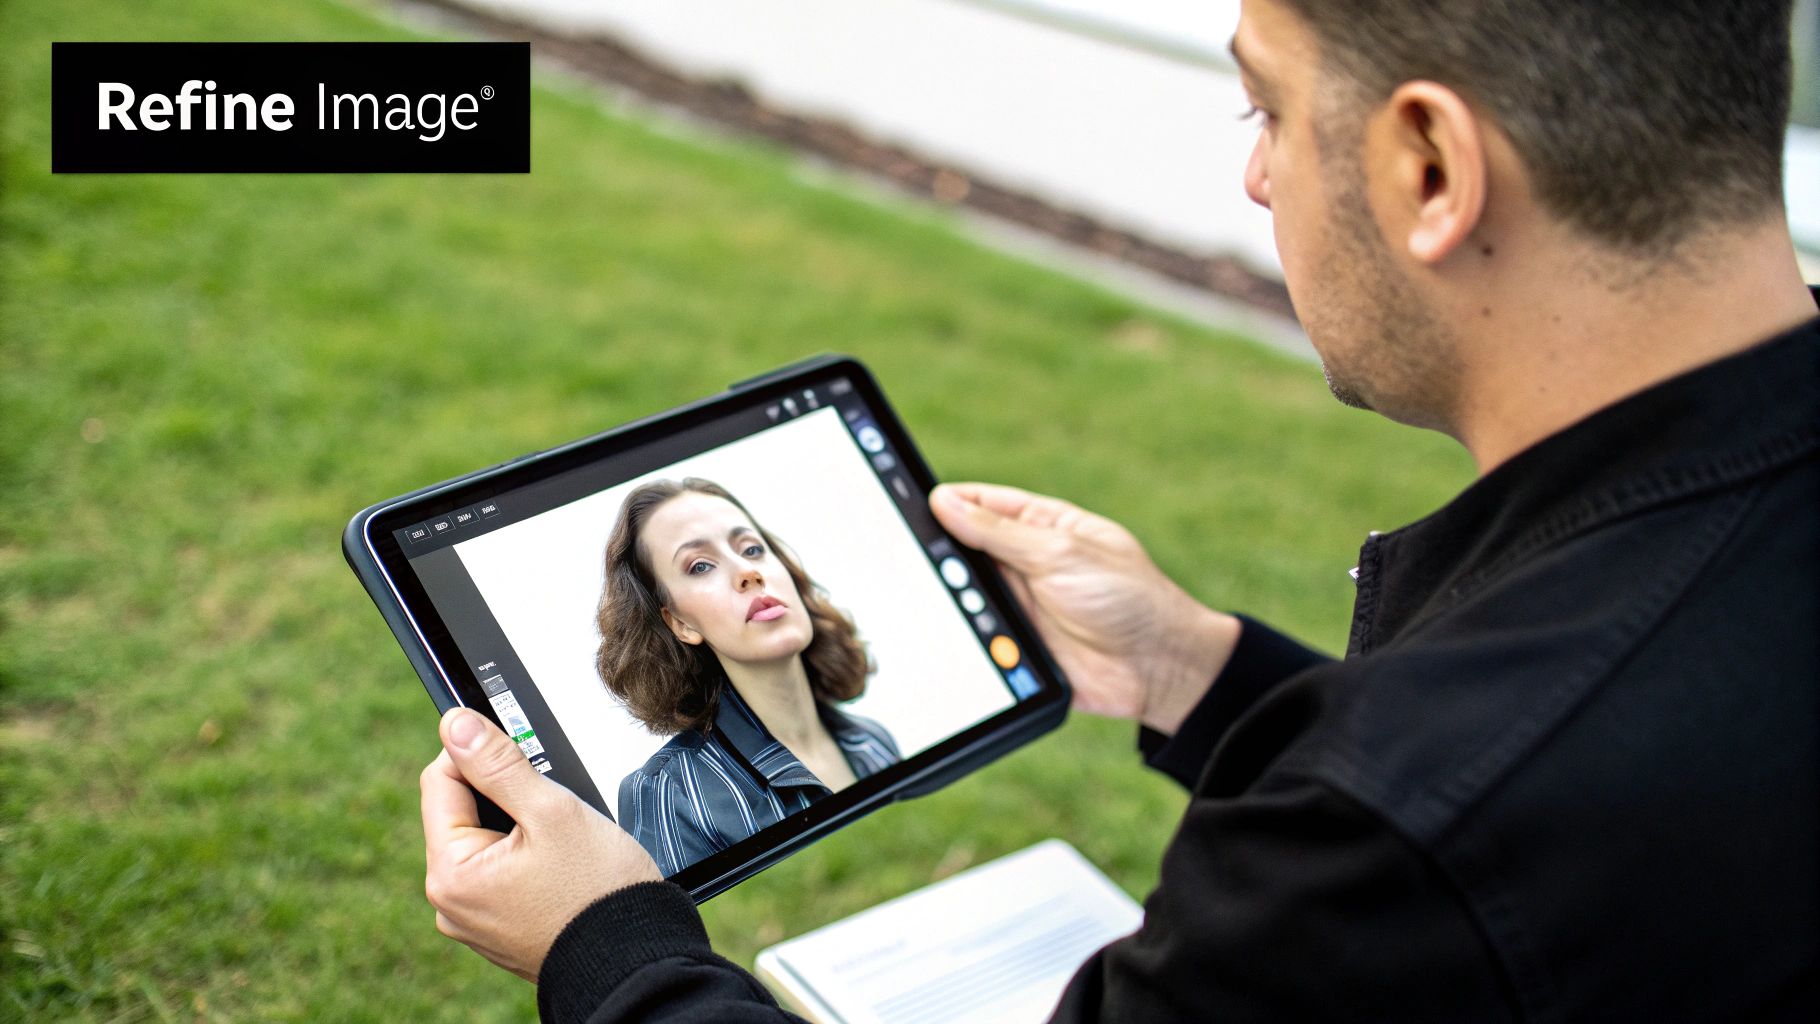
Post-Generation Refinements
Look, even the best prompt can produce an image with a tiny flaw. Don't throw out an almost-perfect portrait just because of one small issue. A little bit of editing after the fact can take your results from good to absolutely flawless.
You don't need fancy software. Free tools like Canva or even your phone's built-in photo editor can make a huge difference:
- Cropping and Framing: This is the easiest fix. Adjust the composition to create a stronger focal point.
- Color Correction: Tweak the brightness, contrast, and saturation to make the colors pop or to nail a specific mood.
- Minor Touch-Ups: Use a spot-healing tool to remove a small, strange artifact the AI generated on a jacket or in the background.
Honestly, spending just five minutes refining your favorite images can dramatically improve their quality. It's that final human touch that makes them ready for your LinkedIn profile or professional portfolio, and it’s what separates a casual user from someone who truly masters this tool.
So You've Got Your AI Photos—Now What?
Making AI images of yourself is a fun and surprisingly creative process, but the real magic happens when you start using them. The portraits you've just created aren't just a cool tech demo—they're powerful digital assets ready to boost your personal and professional life online.
Forget thinking of this as just a new profile picture. You now have a whole portfolio of high-quality images on hand for any scenario, all created for a tiny fraction of the time and cost of a traditional photoshoot. This kind of accessibility is a huge shift in personal photography, kicking down old barriers like needing a studio or a pricey camera. It’s no surprise the market for this tech is projected to hit $60.8 billion by 2030. In fact, 58% of people are already using AI for photo editing. These fascinating AI photography statistics show just how big this trend has become.
Give Your Professional Brand a Serious Upgrade
For anyone in the professional world, these images are a game-changer. You can whip up a set of polished, consistent headshots that are perfect for LinkedIn, your company's website, or that speaker bio you need by tomorrow. Imagine getting a last-minute request for a new photo and having an entire gallery of incredible options ready to go.
Here are a few ways your AI headshots can make a real difference at work:
- LinkedIn Profiles: We all know a sharp, professional headshot gets you more profile views. Now you can generate options in different outfits to perfectly capture your industry’s vibe, whether it's a suit and tie or a business casual look.
- Company Directories: Get that high-resolution, uniform look that matches your company's brand without the logistical nightmare of scheduling a full-team photoshoot.
- Resumes and Portfolios: Adding a human touch to your CV or online portfolio with a headshot that screams confidence and approachability can make all the difference.
The best part is the consistency. You can finally build a cohesive personal brand across every professional touchpoint—from your email signature to your business cards—using images that all share the same high-quality style.
Fuel Your Personal and Creative Projects
The fun doesn't stop at your 9-to-5. On the personal side, the ways you can use these images are just as varied and exciting. Your AI-generated photos can bring a unique and polished feel to your social media, passion projects, and even how you connect with people.
This is where you can really let your creativity run wild. If you're a content creator, you can generate a whole series of thematic photos for your blog or Instagram feed, saving yourself hours of planning and shooting. For anyone building a personal brand, having a library of diverse, high-quality images is crucial for crafting compelling visual content for social media.
Think about trying them out for things like:
- Online Dating Profiles: Make your profile pop with a set of well-lit, flattering photos that show off different sides of your personality, from adventurous and outdoorsy to sleek and sophisticated.
- Personalized Gifts: How cool would it be to create custom art, mugs, or calendars for friends and family using a portrait that is truly one-of-a-kind?
- Creative Content: Use your AI doppelgänger as an avatar for your gaming profiles and forums, or make them the star of your next digital art project.
At the end of the day, these images are a powerful new tool for expressing yourself.
Got Questions About AI Images? Here Are Some Answers
As you dive into creating AI images of yourself, you're bound to have a few questions. I see the same ones pop up all the time. Getting these sorted out from the start makes the whole process a lot smoother and more fun.
How Many Photos Do I Really Need?
This is easily the most common question. The magic number is somewhere between 10 and 20 high-quality photos.
But here's the thing: it’s not just about hitting a number. Variety is king. The AI needs to see your face from different angles, with different expressions, and in different lighting. The more varied the input, the more flexible and accurate your personal AI model will be. Think of it as giving the AI a complete 3D understanding of your face, which is exactly what lets it create such realistic images.
What Happens to My Photos? Is This Private?
Understandably, privacy is a huge concern. You're uploading pictures of your face, after all.
Reputable platforms like YourAIPhotographer are built with security in mind. Your uploaded photos are only used to train your model. They aren't used for anything else. Standard practice is to automatically delete your training photos from the servers after a short period, usually within 24 to 48 hours. The images you generate are yours to keep.
My advice: Always take a quick glance at the privacy policy of any AI service you use. It only takes a minute and gives you peace of mind about how your data is being handled.
Why Do Some of My AI Images Look a Little... Weird?
It can be a bit jarring when an AI-generated image doesn't quite capture you. When this happens, it almost always comes back to the photos you started with.
Here are the usual culprits:
- Poor Quality Photos: If your original pictures are blurry, poorly lit, or low-resolution, the AI simply doesn't have enough data to work with. Garbage in, garbage out, as they say.
- Not Enough Variety: Did you upload 15 selfies all taken from the same angle? That gives the AI a very one-dimensional view. It needs to see you from the side, looking serious, laughing—the whole range.
- Overly Complicated Prompts: Sometimes, asking for too many conflicting things in one prompt can confuse the model. A "happy, sad, surprised astronaut" is probably going to look strange.
The fix is usually straightforward: retrain your model with a better, more diverse set of photos. Also, try simplifying your text prompts to be more direct.
For anyone trying to nail that perfect professional look, we have a whole guide dedicated to it. You can check out our tips on using an AI photo generator for LinkedIn to get it just right.
Ready to create stunning, professional-quality photos without a camera? Train your personal model with YourAIPhotographer and see what you can create in minutes. https://youraiphotographer.com