

How to Take Aesthetic Pictures A Practical Guide
Learn how to take aesthetic pictures with this practical guide. Discover insider tips on lighting, composition, and editing to transform your photos.
Table of Contents
Taking great aesthetic pictures really boils down to four things: how you frame your shot (composition), how you use light, how you arrange the scene (styling), and how you finish the image (editing). It's never been about having the most expensive camera; it’s about training your eye to see the potential in a scene and bring it to life.
What Actually Makes a Picture Aesthetic
Before you even raise your camera, let's talk about what "aesthetic" really means in photography. It's so much more than a trendy filter. It's the overall mood or feeling an image gives off.
An aesthetic photo feels deliberate. It tells a story, even a simple one, through its colors, shadows, and subject. This is what separates a random snapshot from a carefully crafted image that makes you stop scrolling and actually feel something.
The Foundation of a Strong Aesthetic
Every stunning photo you've ever admired is built on a few core ideas. These aren't strict rules, but they are the tools you'll use to guide the viewer's eye and create impact.
- Mood and Emotion: What do you want the viewer to feel? Calm? Nostalgic? Energetic? Your lighting, colors, and subject are all levers you can pull to set the right mood.
- Color Harmony: A consistent color palette is a huge part of what makes a photo feel polished and professional. You might use complementary colors to create a bold pop or stick to a single color family for a more minimalist, calming effect.
- Storytelling: Even a simple photo can tell a story. Think about a steaming coffee cup next to a rain-streaked window—it instantly suggests a quiet, cozy morning. The story doesn't need to be complicated, but your image should feel like it has a purpose.
The real goal is to stop just documenting what’s in front of you and start interpreting it. An aesthetic photo isn't just about what you see; it's about how you see it and what you want others to feel.
Here’s a quick breakdown of the core components we'll be diving into throughout this guide.
The Four Pillars of Aesthetic Photography
| Pillar | What It Means | Why It's Essential |
|---|---|---|
| Composition | How you arrange the elements within your frame. | It guides the viewer's eye and creates balance, turning a chaotic scene into a clear story. |
| Lighting | The quality, direction, and color of the light in your photo. | Light creates mood, defines shape, and can make or break an image. No light, no photo! |
| Styling | The intentional choice of subjects, props, colors, and textures. | This is where you inject your personality and control the narrative of the image. |
| Editing | Refining your image after you've taken it. | Editing enhances the mood and ensures your colors, contrast, and tones are all working together. |
Thinking about these four pillars before and after you shoot will completely change your results.
Finding Your Personal Style
There are so many established aesthetics out there—from the clean, airy vibe of minimalism to the cozy, classic feel of dark academia. Diving into these can be a great way to figure out what you're naturally drawn to.
I always tell people to spend time on platforms like Pinterest and Instagram, not to copy other creators, but to analyze what they're doing. What colors, compositions, and subjects keep catching your eye?
This kind of exploration is a huge step in learning how to take aesthetic pictures that feel authentic to you. Over time, you’ll notice patterns emerging in your own work, and that’s your unique style starting to take shape. For a deeper dive into the technical side of things, our guide on how to make a photo look professional provides a fantastic foundation for any aesthetic you choose.
How to Use Light and Composition
If styling is all about what you're shooting, then light and composition are about how you shoot it. Honestly, these two are the real heavy lifters when it comes to creating an aesthetic picture. Once you master them, you can make a beautiful image just about anywhere, with any camera. You’ve learned to see the world like an artist.
You’ve probably heard the vague advice to "find good light." The truth is, all light is good light if you know how to work with it. The soft, warm glow of the "golden hour"—that first hour after sunrise and the last before sunset—is famous for a reason. It wraps everything in a gentle, directional light that creates long, soft shadows and a dreamy, nostalgic vibe.
But don’t put your camera away when the sun is high and harsh. Midday light gets a bad rap for being unflattering, but you can use it to create incredibly dramatic, high-contrast images full of deep shadows and bright highlights. It's perfect for minimalist architectural shots or edgy street photography where you really want to emphasize shapes and lines.
Mastering Indoor Lighting
You don't need a professional studio to take stunning photos inside. In fact, one of the best light sources you have is probably just a few feet away: a window.
Window light is naturally soft and diffused, which means it creates gentle shadows. For a classic, almost painterly portrait, try placing your subject so the light from the window hits them from the side. This is often called Rembrandt lighting, and it sculpts the face with a beautiful mix of light and shadow, adding real depth and dimension.
You can take this even further by shaping that natural light:
- Grab a reflector. Something as simple as a white poster board or even a t-shirt held opposite the window can bounce light back onto your subject. This fills in the shadows and brightens their features.
- Create a silhouette. Place your subject directly in front of the window and set your camera's exposure for the bright light streaming in from outside. Your subject will become a dark, expressive shape against a brilliant background.
- Look for patterns. Notice how light filters through blinds or tree leaves, creating interesting shapes on a wall or the floor. These natural designs can become a compelling part of your photo.
This graphic shows just how effective a simple reflector can be when paired with window light. It’s a classic trick for achieving that soft, professional look.
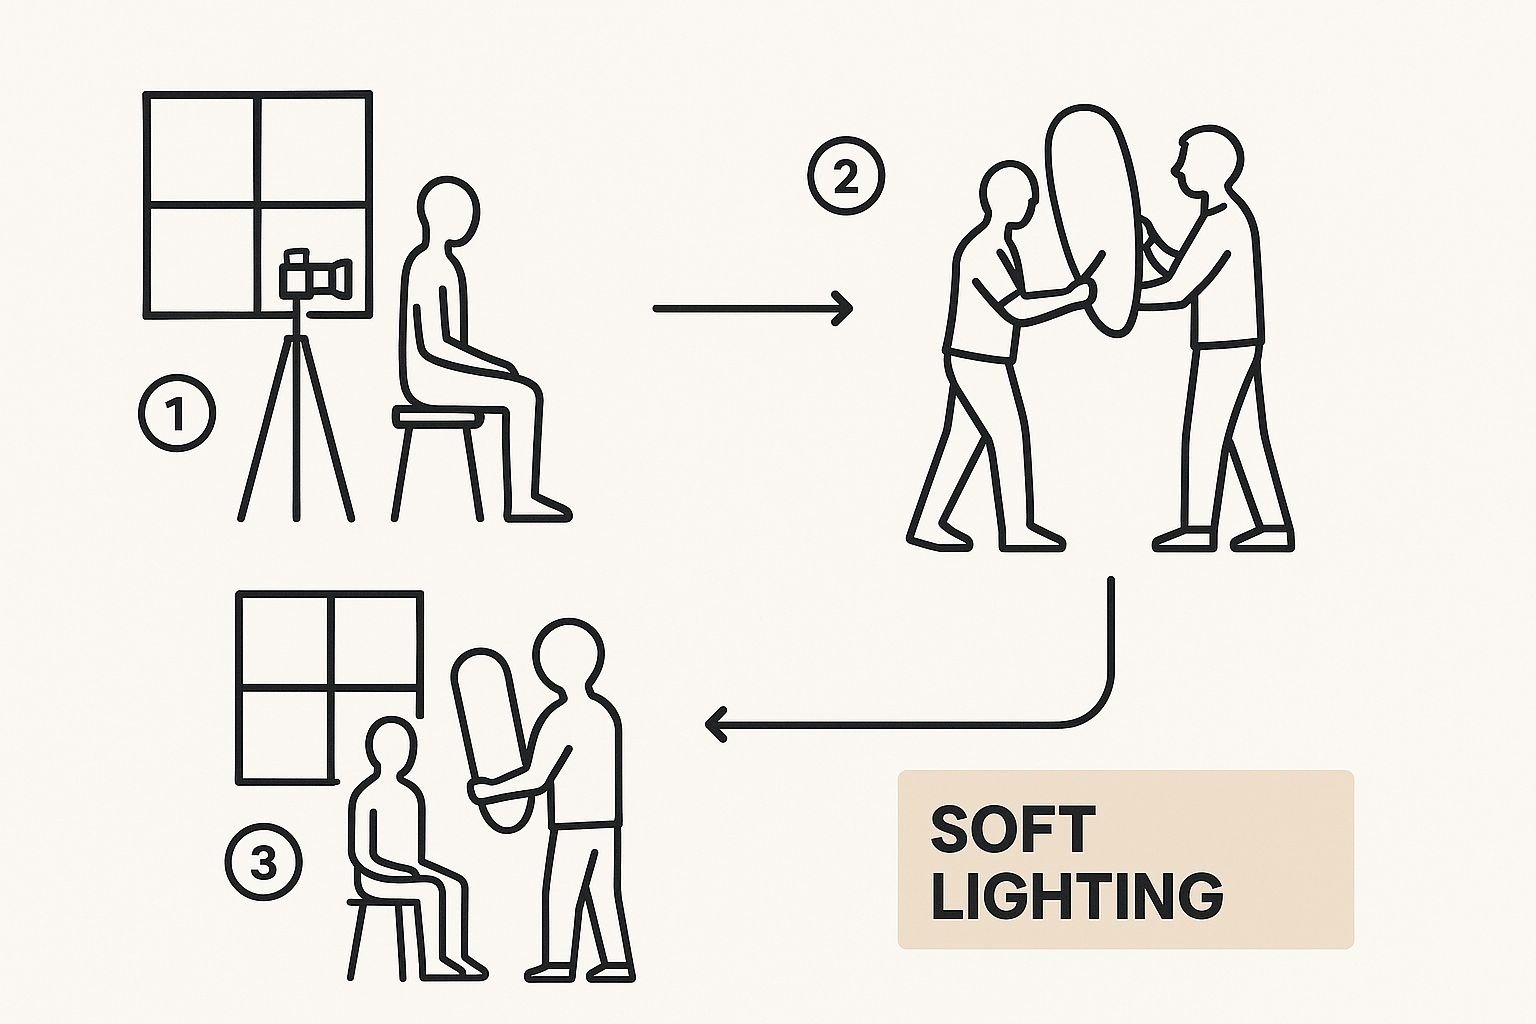
As you can see, a single light source and a basic reflector are often all you need to elevate your indoor photos. If you want to dive into more complex setups, our guide to professional headshot lighting setups breaks down a variety of multi-light configurations.
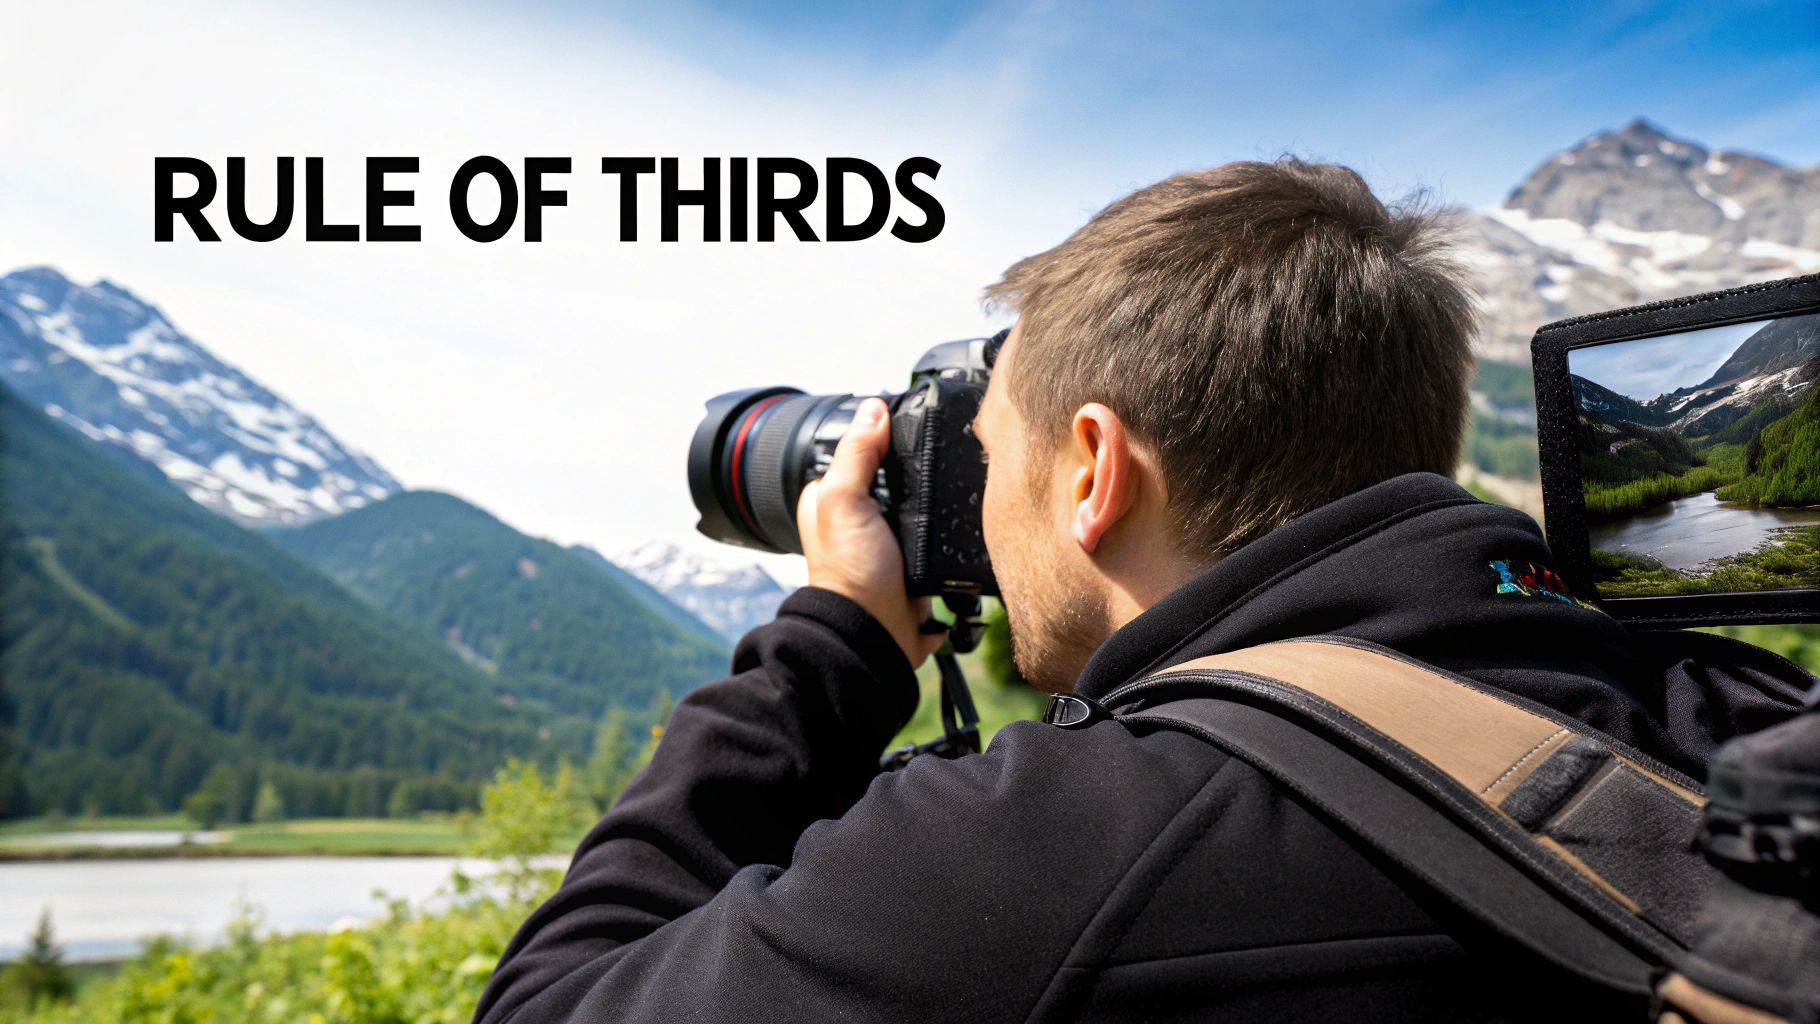
Going Beyond the Rule of Thirds
Composition is simply how you arrange everything in the frame to guide the viewer's eye. The rule of thirds (placing key elements along an imaginary 3x3 grid) is a fantastic starting point, but truly aesthetic photos often rely on more subtle principles.
Composition is the silent storyteller in your photograph. It’s what directs the viewer’s gaze and determines whether an image feels chaotic or harmonious, boring or captivating.
Let's look at a few powerful compositional tools that will help you take more intentional, beautiful pictures.
Using Space and Lines Effectively
Learning to see and use the space and lines in a scene is a total game-changer for photography. These elements give your images structure and a narrative flow, turning a simple snapshot into a thoughtful composition.
Negative Space: This is the "empty" area around your main subject. Don't think of it as wasted space; it’s an active element that gives your subject room to breathe. A lot of negative space can create a sense of minimalism and calm, or even isolation, making your subject stand out with incredible power.
Leading Lines: Keep an eye out for natural lines in your environment—roads, fences, rivers, or the lines of a building. These can be used to lead the viewer's eye directly toward your subject, creating a sense of depth and movement that makes the photo far more engaging.
Framing: Use elements in the foreground to create a natural "frame" around your subject. Think about shooting through a doorway, a window, or between some tree branches. This adds context and depth, making the viewer feel like they’re peeking into a private moment.
By consciously looking for these elements, you start training your eye to see beyond just the subject and to consider the entire scene. This shift in perspective is what it’s all about. Practice these techniques, and you'll soon find yourself seeing compelling photo opportunities everywhere you look.
Styling Your Scene for Better Photos
Look closely at any image you find truly beautiful. Chances are, it wasn't a lucky shot. It was styled. Styling is where you get to play director, carefully choosing every last detail in the frame to build a specific mood or tell a story. This isn't just for fancy product shoots; it applies to everything from a flat lay of your breakfast to a portrait of a friend.
The idea is to create a scene that feels both intentional and real. And no, you don't need a pro studio or a mountain of expensive props. The best-styled photos often just use everyday things in a thoughtful way.
Choose a Cohesive Color Palette
Color is the first thing our eyes register, and it sets the entire mood of your photo. Before you even think about props, decide on the feeling you're after. Warm tones like reds and yellows bring energy and comfort, while cooler blues and greens can feel calm and serene.
Here are a few easy ways to think about color:
- Monochromatic: Stick to different shades of one color. Think of a scene with various greens—a dark olive notebook next to a pale mint teacup. It's an instant recipe for a clean, unified look.
- Analogous: Pick colors that are neighbors on the color wheel, like blue, teal, and green. This creates a natural harmony that's always easy on the eyes.
- Complementary: Go for opposites, like orange and blue. This combo creates a powerful contrast that makes your subject pop right out of the frame. It’s perfect when you really want to grab someone's attention.
The secret isn’t finding the "right" colors. It's about using colors with intention. A simple, cohesive palette will always feel more polished than a chaotic mix.
Selecting Props That Add to the Story
Think of props as the supporting cast in your photo. They’re there to add depth and context, but they shouldn't steal the show. The trick is to pick items that make sense in the scene and help tell your story.
Shooting a cozy work-from-home photo? A steaming mug, a pair of glasses, or an open book feel right. Creating a fresh, summery vibe? Maybe add a slice of lemon, a linen napkin, or a pair of sunglasses.
Good props tell a story. Clutter just creates noise. Before you place an item in the shot, ask yourself: does this add something meaningful? If not, leave it out.
Natural Posing Ideas for Portraits
Styling a scene includes the people in it, too. Nothing ruins a portrait faster than a pose that looks stiff or forced. The goal is to capture genuine personality, not just a smile for the camera.
This move toward authenticity is huge right now. Portrait photography is a massive $20.6 billion industry, and that's because it offers a real human connection. Today, about 70% of portrait photographers are leaning into this "realness," focusing on natural expressions that people connect with.
To get that natural feel, give your subject an action. Instead of just telling them to stand there, try these prompts:
- Have them interact with a prop, like holding a coffee cup or fiddling with a jacket collar.
- Ask them to walk slowly toward you.
- Tell them to look off-camera, as if they’re watching something in the distance.
- Prompt them with a funny question to get a genuine laugh.
These little actions break the tension and lead to candid moments that feel so much more alive. Of course, what your subject wears is a huge part of the overall aesthetic. For some practical tips, check out our guide on choosing https://youraiphotographer.com/blog/good-headshot-outfits.
The Art of Aesthetic Photo Editing
Taking the picture is really just the first step. The edit is where the magic happens—it’s how you take a good shot and turn it into something that feels uniquely yours. This isn’t about fixing mistakes. It’s about refining the mood and developing a signature style that makes your work stand out.
The real goal here is to edit cohesively, so all your photos look like they belong together in a curated collection. Let’s get into the ‘why’ behind each adjustment, not just the ‘how,’ so you can build a look that’s all your own.
Start with the Fundamentals
Before you even think about slapping on a trendy filter, every great edit begins with a solid foundation. I always start in an app like Adobe Lightroom Mobile or VSCO, because they give you precise control over the building blocks of the image.
Get comfortable with these three core settings first:
- Exposure: This is your overall brightness. I find that slightly underexposing a photo can create a moody, dramatic feel. On the flip side, pushing the exposure up a bit gives you that light, airy, and dreamy quality.
- Contrast: This controls the gap between your darks and lights. Pumping up the contrast creates a punchy, bold look, while pulling it down results in a softer, more muted vibe that often feels vintage-inspired.
- White Balance: This sets the color temperature. A warmer balance (more yellow) gives you that cozy, golden-hour vibe. A cooler balance (more blue) makes things feel crisp, clean, or even a little somber.
Honestly, mastering these three sliders is the most important step toward intentional editing. They set the entire mood before you touch anything else.
Editing isn't about making a photo look 'perfect'—it's about making it feel how you want it to feel. A slight adjustment in exposure or warmth can completely change the emotional impact of an image.
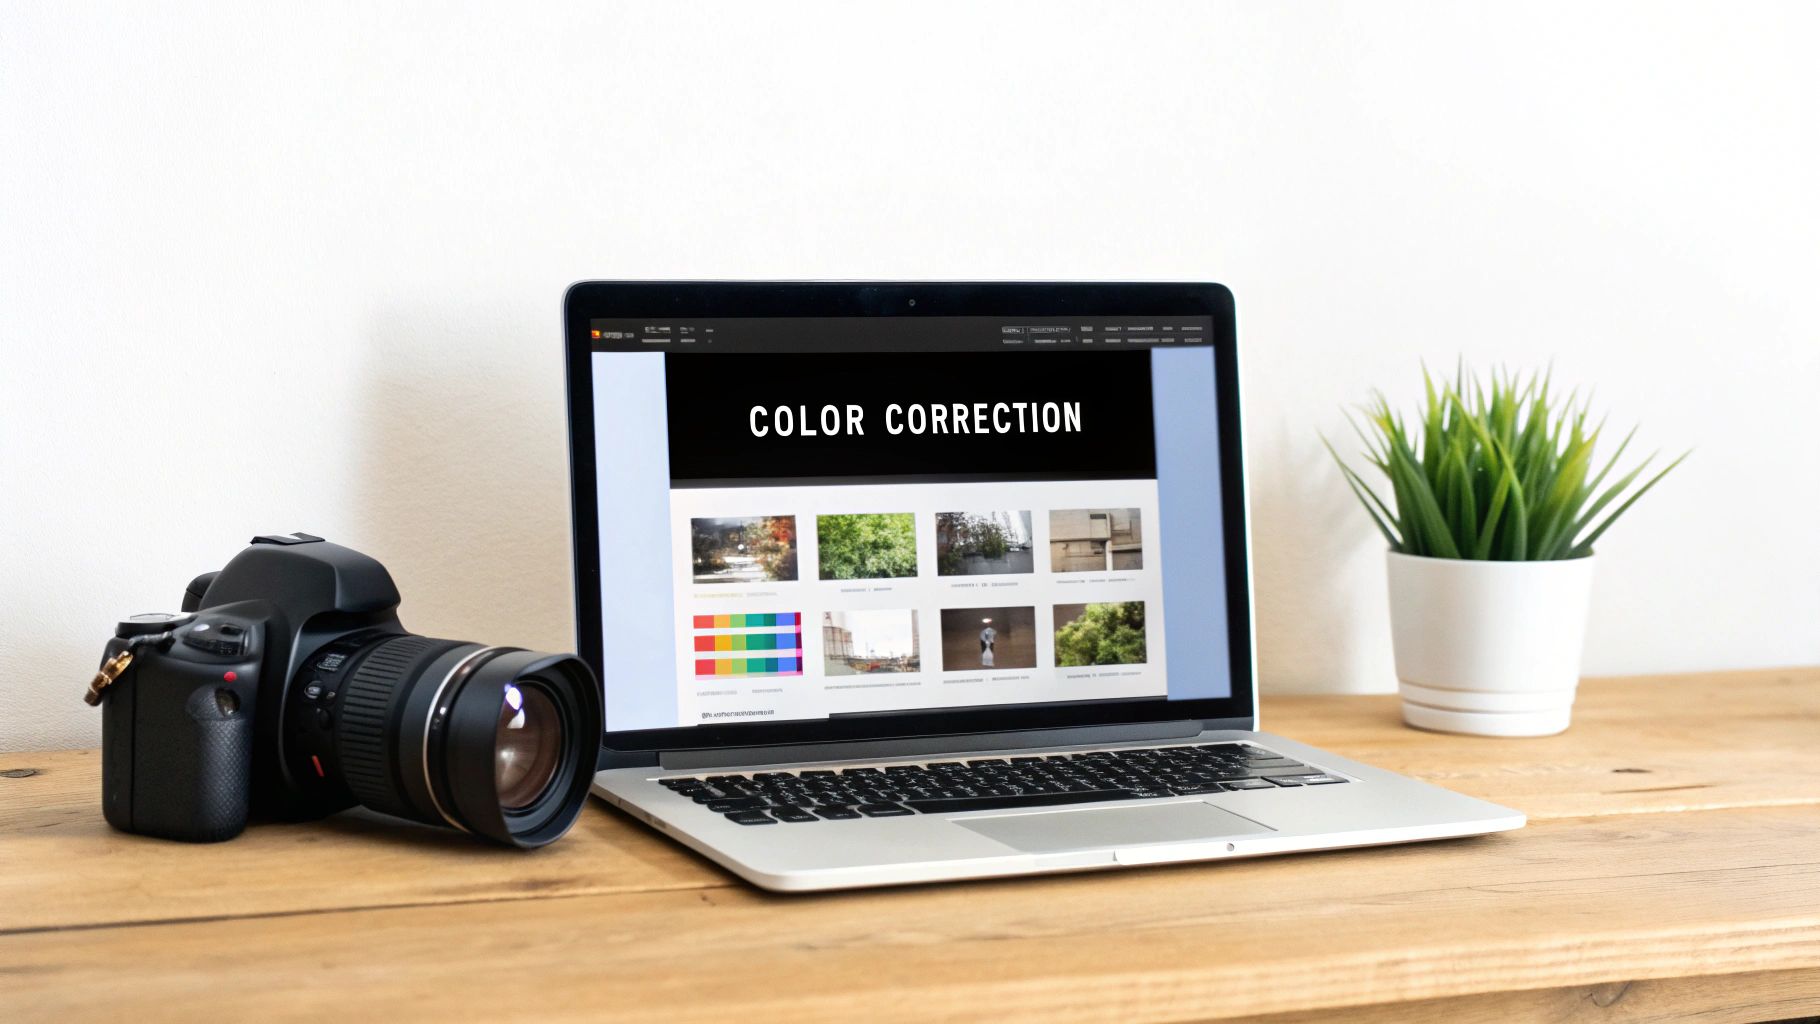
Mastering Color with HSL Sliders
Once the basics are locked in, the real creative work starts with color. This is where you can truly carve out your aesthetic. My go-to tool for this is the HSL (Hue, Saturation, Luminance) panel in Lightroom.
What makes it so powerful? It lets you tweak individual colors without messing up the rest of the image. Say you have a photo with a really bright blue sky, but you want a softer, more desaturated look. Instead of lowering the overall saturation (which would make your subject look dull), you can just target the blue channel and tone it down.
Here’s how you can use HSL to nail some popular aesthetics:
- Light & Airy: Boost the luminance of yellows and oranges. This makes skin tones glow. Then, slightly desaturate the greens and blues for a soft, pastel feel.
- Dark & Moody: Lower the luminance of most colors, especially blues and greens, to deepen those shadows. Try shifting the hue of your greens toward yellow for a more autumnal, earthy palette.
- Warm & Vintage: I like to shift the hue of greens toward yellow and blues toward teal. Then, I’ll desaturate all the colors just a bit to give them that faded, nostalgic quality.
Fine-tuning your colors is a massive part of the process. For a deeper dive, our guide on color correction for photos breaks down these techniques even further.
Emulating the Timeless Feel of Film
There’s a reason so many aesthetic trends pull from analog photography. Film just has this texture and character that feels timeless. The good news is, you can get that same feeling digitally.
Film is having a major comeback, especially with creators who want to step away from that hyper-perfect digital look. In fact, over 60% of professional photographers now add film-inspired effects like grain to their work to get a more emotive feel. You can read more about the resurgence of analog techniques on Adorama.com.
Here’s how you can add some of that analog soul to your own photos:
- Add Grain: Most editing apps have a "grain" slider. The key here is subtlety. Start with just a tiny amount—you want to add texture, not noise. A touch of grain can soften those sharp digital edges and add a beautiful, organic feel.
- Use the Tone Curve: This is a more advanced tool, but it's a game-changer. Creating a gentle "S" shape will boost contrast. For that faded, matte look, just lift the bottom-left point of the curve slightly. This turns pure blacks into a soft grey, a classic hallmark of vintage prints.
- Introduce a Fade: Some apps have a simple "fade" slider, which does something similar to lifting the blacks in the tone curve. It just dials down the overall contrast and gives the whole image a softer, more gentle appearance.
When you start combining these techniques, you move beyond simple filters. You’re building a sophisticated, cohesive aesthetic that really tells your story.
Developing Your Own Photographic Eye
Getting a handle on the technical stuff—lighting, composition, editing—is a huge milestone. But the real magic happens when you start to see the world in a way that’s completely your own. This is where you shift from someone who follows the rules to an artist with a point of view.
It’s about moving beyond just recreating what’s trendy. It's about letting your personality and passions bleed into your work. That’s what makes an image stick with someone long after they've scrolled past.
Finding Inspiration Beyond Social Media
Let's be honest, social media is an echo chamber. It's a decent starting point, but if it's your only source of inspiration, your work will end up looking like everyone else's. To really develop a unique style, you have to look elsewhere.
Think of it as building a mental library of visuals. The goal is to absorb ideas, not just copy photos.
- Classic Films: Watch how a director like Wes Anderson uses symmetry and color to tell a story. Or look at old film noir and see how shadows create a sense of mystery.
- Painting: Go way back. The soft, moody light in a Rembrandt portrait can teach you more about light than a thousand tutorials. Study how different artists have solved problems of composition and color over centuries.
- Nature: Seriously, just go for a walk. The patterns on a leaf, the texture of bark, the way light dapples through trees—nature is full of perfect, ready-made compositions.
When you pull from these kinds of places, you start to create images that feel more timeless and personal. Your work will stand out because it’s built on a foundation deeper than the latest trend.
Start a Personal Project
Want a shortcut to finding your photographic voice? Start a personal project. It’s the single best way to force yourself to shoot with purpose instead of just taking random pretty pictures.
Your project doesn't have to be a grand, world-changing epic. Its only job is to keep you shooting with intention. Consistency is what really fuels creative growth.
Pick a theme you actually care about, because that excitement will keep you going. It could be as simple as documenting your neighborhood coffee shops, shooting portraits of strangers you meet on your commute, or even taking one photo inside your home every day for a month. This kind of focused practice really accelerates your learning and helps you figure out what you truly love to shoot.
Practicing Mindful and Ethical Photography
As your eye develops, so should your conscience. A truly aesthetic picture isn't just about what's in the frame; it’s about how it was made. That means being mindful and ethical, showing respect for your subjects and the places you shoot.
This isn’t just a nice idea; it’s becoming a core part of modern photography. Think about the global push for sustainability—it's changing what "aesthetic" even means. An IBM survey found that nearly 60% of consumers are willing to pay more for products from environmentally responsible brands, and that mindset is seeping into the creative world. Photographers are adopting energy-efficient gear and choosing themes that blend art with advocacy.
To put this into practice, always ask for permission before taking someone's picture, especially if they're identifiable. When you're out in nature, live by the "Leave No Trace" principles. Don't disturb wildlife or trample a field of flowers just for a shot. Ethical photography gives your work a layer of integrity that people can feel.
In the end, developing your photographic eye is a journey, not a destination. It’s all about staying curious and shooting with purpose. As you explore new tools, like those we cover in our guide to the role of AI in modern photography, just remember they are there to serve your vision. Your unique perspective is, and always will be, your most powerful tool.
Common Questions About Aesthetic Photography
Even after you've learned the ropes, a few common questions always seem to pop up when you're trying to nail that aesthetic look. Let's walk through some of the most frequent hurdles and get you past them.
Do I Need an Expensive Camera?
Not at all. I've seen breathtaking photos taken on a smartphone and uninspired shots from a $5,000 camera. The gear doesn't make the artist; your eye for light, shadow, and composition does.
The camera in your pocket is more than capable. Instead of worrying about equipment, focus on mastering the tool you already have. Dive into its "pro" mode to get a feel for manual controls. Your creativity and unique perspective are what will make your photos stand out, not an expensive lens.
How Do I Find My Personal Photography Aesthetic?
This is a big one. Finding your style isn't something you decide on overnight—it's a process of discovery. It’s all about experimenting and seeing what you're naturally drawn to.
A fantastic starting point is to build a mood board. Hop on Pinterest or just start a dedicated folder on Instagram for images that make you stop scrolling. After you've collected a good number of them, step back and look for patterns.
- What's the mood? Are your saved images consistently bright and cheerful, or are they dark and cinematic?
- What are the subjects? Do you gravitate toward candid portraits, sweeping landscapes, city streets, or quiet, minimalist scenes?
- What's the color story? Do you see a lot of warm, earthy tones, or do you prefer cool blues and vibrant neons?
Once you identify these common threads, use them as a creative prompt. Try to shoot photos that capture that same feeling. The more you practice, the more your style will become a natural blend of your influences and your own voice.
Finding your aesthetic is less about making a conscious choice and more about recognizing what you already love. Your style is just your point of view, translated into a visual language.
Why Do My Photos Look So Flat and Boring?
If your photos are falling flat, the culprit is almost always one of two things: lighting or depth. Luckily, both are easy to fix once you know what to look for.
A "flat" look usually comes from harsh, direct light, like shooting under the midday sun. This kind of light kills all the interesting shadows that give a subject its shape and texture. The fix? Shoot during the "golden hours"—that magical time right after sunrise or just before sunset. The light is soft, warm, and comes from the side, creating beautiful long shadows that instantly add dimension.
To create more depth, start thinking in layers. Don't just place your subject in the middle of the frame. Try shooting through something in the foreground—like the leaves of a plant, the edge of a building, or over someone's shoulder. This simple technique pulls the viewer into the photo, making it feel more immersive and three-dimensional.
What Are the Best Apps for Aesthetic Editing?
You don't need a complicated desktop setup to get a professional look. For both newcomers and seasoned photographers, a few mobile apps are real standouts.
Adobe Lightroom Mobile is the undisputed champion. It gives you incredible control over light and color, and its core features are completely free. It’s the perfect place to learn the fundamentals of editing.
VSCO is another fan favorite, celebrated for its stunning, film-inspired presets that can give your images a specific vibe in one tap. For something a bit more trend-focused, an app like Tezza provides curated filters and effects that are popular on social media. My advice? Start with Lightroom to build a solid foundation, then explore other apps to find presets that complement your style.
Ready to create stunning, photorealistic images without ever picking up a camera? YourAIPhotographer lets you train a personalized AI model to generate professional-quality photos in just a few seconds. It’s perfect for elevating your social media feed, creating amazing headshots, or styling a virtual lookbook with just a few clicks. Discover the future of photography at youraiphotographer.com.