

How to Train an AI Model for Photorealistic Art
A practical guide on how to train an AI model for stunning, photorealistic images. Learn to curate datasets, adjust settings, and craft prompts.
Table of Contents
Training an AI model used to be something only giant tech companies could do. Now, it's accessible to creators like you. The basic idea is to show an AI a curated set of your photos, teaching it a specific face, object, or style. This process fine-tunes the AI, turning it from a general-purpose tool into your personal creative partner.
The goal is to get the AI to understand exactly what you want, so it can generate completely new images that look just right.
Why Bother Training Your Own AI Model?
Generic AI image tools are fun, but they have their limits. They're great for broad concepts, but they struggle to create images of a specific person or replicate a unique artistic flair consistently. When you learn how to train an AI model yourself, you're no longer just rolling the dice with a public tool; you're building a specialized expert.
This opens up a whole new world of possibilities for artists, influencers, and businesses.
Next-Level Personalization: A custom model can generate images of a specific person with stunning realism. This is perfect for creating professional headshots, modeling photos, or dynamic social media content without a physical photoshoot. For a closer look at this, see our complete guide on how to make AI images of yourself.
Consistent Creative Style: Are you a photographer with a signature editing style? Or an illustrator with a distinct look? You can train a model on your portfolio, essentially teaching the AI your aesthetic. It can then generate new work that perfectly matches your existing brand.
You're in Control: This is the big one. By hand-picking your training photos, you dictate exactly what the AI learns. You sidestep the unpredictability of public models and gain precise control over the final images.
It’s Easier (and Cheaper) Than Ever
Just a few years ago, training your own AI model was a pipe dream for most people. The computing power required was immense and incredibly expensive. Thankfully, that's changed dramatically.
Costs have nosedived. To put it in perspective, using a powerful model like GPT-3.5 has dropped from around $20 per million tokens in 2022 to a mere $0.07 by October 2024. This incredible drop in cost has made custom AI accessible to everyone.
The key takeaway is this: You're not building a massive AI from the ground up. You're taking a powerful, pre-existing AI and giving it a highly specialized new skill—learning to recognize and recreate your subject or style with precision.
Before we dive into the step-by-step process, let's get a bird's-eye view of the journey. Training your own model involves a few distinct phases, each with a clear purpose.
Core Stages of Training Your Custom AI Model
This table gives a high-level overview of the key phases involved in the AI training process we will cover in this guide.
| Stage | Objective | Key Action |
|---|---|---|
| 1. Data Curation | Gather high-quality, diverse images | Select and prepare 10-20 photos of your subject. |
| 2. Model Training | Teach the AI your unique subject or style | Upload your photos and initiate the training process. |
| 3. Image Generation | Use the trained model to create new images | Write descriptive prompts to guide the AI's output. |
| 4. Refinement | Fine-tune your results for perfection | Experiment with prompts and settings to improve images. |
This roadmap provides a clear path from a folder of photos to a gallery of stunning, personalized AI-generated images.
In this guide, we'll walk you through this entire process using a platform like YourAIPhotographer, which handles all the complex stuff for you. We'll cover everything from choosing the perfect training photos to writing prompts that generate exactly what you envision. By the end, you'll be ready to create an AI model that truly understands you.
Building Your Perfect Image Dataset

Let's get one thing straight: the single biggest factor in your AI's success is the quality of your training photos. It's that simple.
Think of it this way. If you wanted an artist to paint your portrait, you wouldn't hand them a stack of blurry, poorly-lit photos all taken from the same angle. You'd give them a collection that truly shows who you are. The exact same logic applies here. Your goal is to curate a clean, diverse set of images that gives the AI a complete picture of your subject. This step is all about thoughtful selection, not technical wizardry. It's the foundation for everything that follows.
What Makes a Training Photo “Good”?
When you’re picking out photos, you have to think like the AI. It's learning from every single pixel, every shadow, and every angle you give it. A "good" photo for training goes beyond just being a nice picture; it's a valuable piece of data.
Here's what I look for when I'm putting together a dataset:
- Clarity is King: Ditch any photos that are blurry, out-of-focus, or low-resolution. The AI needs sharp details to understand facial features and textures.
- Show Every Angle: Mix it up! Include shots from straight on, a three-quarter view, profile shots, and even slight head tilts. This is how the model learns the 3D structure of a face.
- Vary the Lighting: Don't stick to perfect studio lighting. Photos in natural light, standard indoor light, and even some with soft shadows help the model create realistic images in any scenario.
- Capture a Range of Expressions: Give it a little personality. A set of photos showing different emotions—smiling, neutral, laughing, serious—builds a model that can generate far more dynamic and lifelike portraits.
How Many Images Do You Really Need?
This is the question I get asked most often, and the answer is probably fewer than you think. When you're training a model on a person, quality always beats quantity.
From my experience, a well-chosen set of 15 to 30 high-quality images is the sweet spot. This gives the AI enough information to learn the subject’s features inside and out, without getting confused by too many repetitive or bad photos. Too few, and the likeness might be off. Too many similar photos, and you can actually box the AI in creatively.
The focus on high-quality data isn't just a best practice; it's what drives the entire industry. The global market for AI training data was valued at USD 2.60 billion in 2024 and is expected to hit USD 8.60 billion by 2030. That explosive growth shows just how crucial well-prepared data is for building powerful AI.
Common Pitfalls to Sidestep
Knowing what not to use is just as important as knowing what to include. Steer clear of these common mistakes that can seriously trip up your AI model.
- Heavy Filters and Edits: Avoid photos with strong Instagram-style filters or dramatic color changes. The AI might learn the filter instead of the person's actual features.
- Things in the Way: Photos where the face is partly covered by hands, sunglasses, or deep shadows are a no-go. The AI needs a clear, unobstructed view to do its job.
- Group Shots: Keep your dataset focused. If you're training on one person, don't include photos with other people. It just muddies the waters and confuses the learning process.
My Pro Tip: Treat this like you're creating a "greatest hits" album, not just dumping your entire camera roll. A little time spent curating your images now will save you a ton of headaches and produce dramatically better results down the line.
Prepping Your Images for Training
Once you have your final set of photos, a few quick prep steps can make a world of difference. You don't need to be a Photoshop pro, but a little cleanup ensures the AI is learning from the best possible source material.
The main goal here is consistency. Simple tweaks to lighting or color can help create a more balanced dataset. For example, if some of your photos are super dark and others are blown out, a quick brightness adjustment can level the playing field. For anyone wanting to go a bit deeper, we have a great guide on mastering color correction for photos.
Before you hit upload, do one last check. Are the files a common format like JPG or PNG? Is the subject the main focus of the frame? Taking care of these small details ensures you’re feeding your AI a clean, powerful dataset that’s ready for success.
Kicking Off the AI Training Process
You’ve done the hard part: assembling a killer dataset of images. Now for the fun part. It's time to actually train the AI model. This is where your curated photos are transformed from a simple collection into an intelligent tool that truly understands your subject or aesthetic.
Platforms like YourAIPhotographer make this incredibly simple by handling all the complex, behind-the-scenes work. Your job is to act as the creative director, setting a few key parameters that will guide the AI on how to learn. Think of these settings as dials you can turn to influence the final result.
Getting Your Images Uploaded and Ready to Go
The first step is a breeze: just upload your folder of images. Once they're in the system, you'll see a handful of settings. Don't let the technical terms throw you off. Each one has a clear purpose and gives you more control over the final model.
You've already put in the most critical effort by preparing a high-quality dataset. Now, you're just giving the AI its final marching orders before it starts learning.
The process you've just completed—collecting, cleaning, and organizing your photos—is the foundation for everything that comes next.
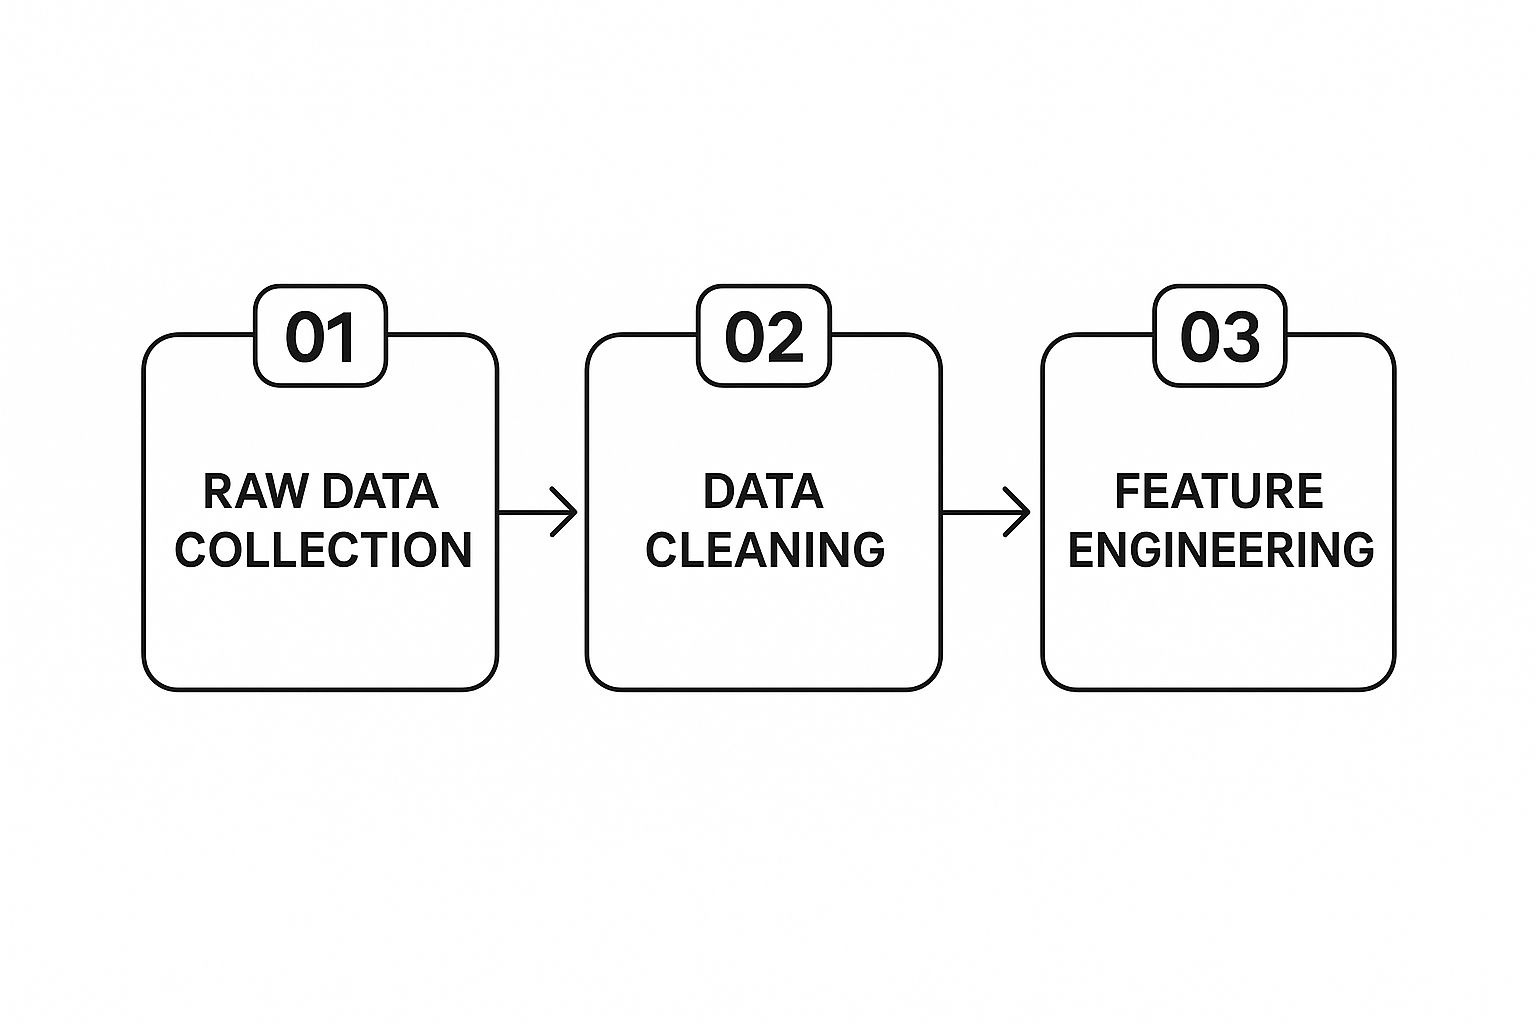
As this graphic shows, starting with a clean, well-organized dataset is the key to getting a powerful and accurate AI model.
Making Sense of the Training Settings
When you kick off a training session, you'll be prompted to adjust a few parameters. While the default settings are usually a solid place to start, knowing what each one does will help you fine-tune your results down the line.
The two most important settings you'll encounter are Training Steps and Learning Rate.
Training Steps: This tells the AI how many times it should cycle through your image set. It's like studying for a test. Too few reps, and it won't grasp the details. Too many, and it can "overfit," meaning it memorizes your photos instead of learning the underlying concepts, which limits creativity. A great starting point is usually between 1,500 and 2,500 steps.
Learning Rate: This setting controls the size of the adjustments the AI makes as it learns. A high learning rate means it makes big, quick changes, while a lower rate encourages smaller, more careful adjustments. From my experience, a slower, lower rate often produces a more polished and accurate model in the end.
My Personal Takeaway: For your first model, just stick with the recommended defaults. It's the best way to get a baseline. After you see what it produces, you can decide if you want to train a new version with more steps for extra detail or a different learning rate to nudge the style. It's all part of the creative process.
Training Parameter Settings and Their Impact
To help you dial in your model perfectly, it helps to understand how the main settings interact. This table breaks down the most common parameters you'll adjust.
| Parameter | What It Controls | Recommended Starting Point |
|---|---|---|
| Training Steps | The number of learning repetitions. More steps can increase detail but risk overfitting. | 1,500 - 2,500. Less for styles, more for specific subjects. |
| Learning Rate | The speed at which the model learns. Lower rates are more precise but slower. | A low-to-mid range setting. Avoid high rates unless you're experimenting. |
| Model Type | The base AI architecture you're training on. Some are better for realism, others for artistic styles. | Stick with the platform's general-purpose or photorealistic default model first. |
Getting a feel for these settings is more of an art than a science. Your first model is just the beginning of the journey.
So, What's Happening While It Trains?
Once you hit that "Start Training" button, the system takes over. This is where you can grab a coffee and relax.
Patience is key here. Training a model isn't instantaneous. Depending on how many images you uploaded and the number of steps you selected, the process can take anywhere from 30 minutes to a couple of hours. Platforms like YourAIPhotographer will send you a notification when it's done.
During this time, the AI is methodically analyzing every pixel, texture, shape, and lighting cue in your photos. It's building a complex mathematical understanding of your subject, turning it into a flexible concept that it can use to generate entirely new images from a simple text prompt. If you're curious about the bigger picture, learning more about how AI for photography is evolving can give you some great context.
When the process is finished, you’ll have your very own custom-trained model file. This is your unique digital asset, ready and waiting for you to bring your creative visions to life.
Crafting Prompts That Generate Stunning Images

Alright, you’ve guided the AI through its training, and now the real fun begins. Your personalized model is like a high-performance engine, but it needs a skilled driver to tell it where to go. That driver is your text prompt—the specific instructions that turn your creative vision into a stunning, photorealistic image.
Think of it this way: your trained model is a brilliant artist who knows your subject inside and out. A vague request like "paint a portrait" will get you a generic, uninspired result. But asking for "a dramatic, low-light portrait with Rembrandt lighting, capturing a thoughtful expression" is how you get a masterpiece. The quality of what comes out is directly tied to the quality of what you put in. This is the art and science of writing great prompts.
The Anatomy of a Powerful Prompt
A truly effective prompt isn't just a simple sentence; it’s a layered recipe of instructions. Once you understand the core components, you’ll have a repeatable framework for getting consistently excellent images. Each piece adds a new layer of detail, giving you more and more control over the final picture.
For photorealistic images, a strong prompt usually boils down to these key ingredients:
- Subject and Trigger Word: First things first, call up your trained model with your unique trigger word. Then, clearly describe the subject and what they're doing.
- Artistic Style: What's the overall vibe? Specify the aesthetic you're after. Words like "photorealistic," "cinematic," or "studio portrait" immediately set the mood.
- Lighting Details: In photography, lighting is everything. Use descriptive terms like "soft natural light," "golden hour," or "dramatic side lighting" to shape the scene.
- Camera and Lens Specs: This is a pro-level tip that makes a huge difference. Mentioning camera details like "shot on a DSLR, 85mm lens, f/1.8" tells the AI to mimic a professional setup, boosting realism.
- Fine Details: Don't forget the little things. Add specifics about clothing, the setting, the color palette, or the mood to really dial in the image.
From Vague Ideas to Vivid Images
Let's put this structure into practice. The difference between a weak prompt and a strong, layered one is night and day. A simple prompt leaves too much up to the AI's imagination, which often leads to generic or just plain weird results.
Weak Prompt Example:[trigger word] as an astronaut
You might get something cartoonish or basic. The AI has to guess about the style, the lighting, the composition—pretty much everything.
Strong Prompt Example:Photorealistic portrait of [trigger word] as an astronaut inside a spaceship, dramatic cinematic lighting filtering through the window, detailed suit, determined expression, shot on a DSLR with a 50mm f/1.4 lens, sharp focus
This detailed prompt leaves nothing to chance. It locks in the style, environment, lighting, emotion, and even the camera setup. The result? A much more compelling and believable image.
The main takeaway is simple: Be specific. The more detail you feed the AI in your prompt, the less it has to guess, and the closer the final image will be to what you pictured in your head.
Harnessing the Power of Negative Prompts
Telling the AI what you want is only half the battle. Telling it what you don’t want is just as important. That's where negative prompts come in.
Think of them as a filter. They remove unwanted elements or qualities from your image, which is a critical step for cleaning up your results and getting that professional finish. For instance, if you notice your images keep coming out with distorted hands or a cartoony feel, a negative prompt can fix that.
Here are a few common ones I use all the time:
cartoon, painting, illustration, drawingblurry, low quality, jpeg artifactsdeformed, disfigured, extra limbs, bad anatomywatermark, text, signature
Using a negative prompt like deformed hands, extra fingers can dramatically improve the realism of your portraits. Experimenting with these exclusions is a key part of mastering the image generation process. And for those looking to create truly top-tier portraits, seeing what the best AI portrait generators can do can offer even more ideas.
By getting comfortable with both positive and negative prompts, you gain precise control over your custom AI model. You're no longer just a button-pusher; you're directing a virtual photoshoot where every detail is tailored to your command. This structured approach is how you move from basic outputs to truly breathtaking, personalized art.
Taking Your AI Model to the Next Level

Your first trained model is a huge win, but it's really just the beginning. The real magic happens when you start to iterate and refine. Once you’ve got a handle on the basics of how to train an AI model, you can treat it like a living project—one that gets better and smarter with every adjustment you make.
This is where you shift from just using the tool to actually directing it. Instead of settling for the first batch of images, you’ll learn how to nudge your model toward your specific creative vision, whether that’s perfecting a tricky lighting setup or teaching it a whole new subject.
The Power of Iterative Training
The single most important advanced technique is what’s called iterative training. It sounds technical, but it’s simple: you train, you test, and then you train again with targeted improvements. Your first model is your baseline. After generating a few dozen images, you'll quickly spot its quirks.
Maybe it can’t quite get profile shots right, or every image has the same boring, flat lighting. That’s not a failure; it’s feedback. Now you can go back to your dataset and fix those specific issues.
- Address the Weak Spots: If side profiles are a problem, find three or four great profile shots, add them to your dataset, and retrain the model.
- Double Down on Strengths: If it's already creating incredible photos in natural light, feed it even more examples to make that its signature strength.
This cycle of generating, critiquing, and retraining is how the pros build world-class models. Each loop pushes your AI's quality and versatility just a little bit further.
The goal isn't to get it perfect on the first try. It’s all about making small, deliberate improvements with each training session. Think of it as an ongoing conversation with your AI.
Fine-Tuning Your Model for New Styles
So, what happens when you want to teach your model a completely new skill? That's where fine-tuning comes in. Fine-tuning lets you take a model that already understands your subject (like your face) and teach it a new style or concept using a small, fresh batch of photos.
Let's imagine you have a fantastic model of yourself but now you want to generate images that look like they were shot on vintage film.
- Build a "Style" Dataset: First, gather 10-15 images that perfectly capture that vintage film look. These photos don't need to include you at all—they just need to define the aesthetic.
- Fine-Tune Your Existing Model: Instead of starting from scratch, you tell the platform to use your original model as the foundation and train it on this new, much smaller style dataset.
This process is way faster than a full training run because the AI isn't learning from zero; it's just adding a new layer of knowledge. It's an incredibly efficient way to expand your creative options without having to rebuild everything. For more on achieving this level of authenticity, check out our guide on finding the best realistic AI image generator.
Getting Strategic With Training Parameters
Beyond curating your dataset, you can also get better results by tweaking the training parameters themselves. The default settings are designed to be a great starting point, but small adjustments can unlock completely different outcomes.
| Parameter Tweak | What It Does | When to Use It |
|---|---|---|
| Increase Training Steps | Pushes the model toward more detail and realism. | Your images feel a little undefined or "soft." |
| Decrease Training Steps | Gives the model more creative freedom and flexibility. | Your AI is just copying your input photos too closely. |
| Adjust Learning Rate | Controls how quickly the model learns from the data. | Lower it for more careful, precise results with complex subjects. |
Mastering these skills really sets you apart. With the global artificial intelligence market projected to hit around $1.81 trillion by 2030 and over 60% of enterprise SaaS products now embedding AI features, this is more than a hobby—it's a valuable skill. By moving beyond the basics, you turn your AI from a simple tool into a true creative partner that grows right along with you.
Got Questions About AI Model Training? We've Got Answers
Jumping into training your own AI model for the first time usually brings up a handful of questions. It's totally normal. Here, I'll walk you through the practical stuff we hear about most often, drawing from countless hours of helping people just like you get it right.
Think of this as your personal cheat sheet for clearing up those common uncertainties.
How Many Pictures Do I Actually Need?
This is, without a doubt, the number one question people ask. And the answer might surprise you. You don't need a massive library of photos. Far from it. When it comes to training a personal model, variety and quality will always beat quantity.
For a solid, dependable model of a single person, aim for a sweet spot of 15 to 30 high-quality images. That’s it. This gives the AI enough visual information—different angles, expressions, and lighting—to truly learn your subject. A small, carefully chosen set of diverse photos will give you vastly better results than a huge dump of similar-looking selfies.
Can I Train a Model on Multiple People or Styles at Once?
I get the temptation, but for the best results, you really need to stick to a one-to-one approach. That means one model for one person, or one model for one specific style.
Trying to cram multiple faces or aesthetics into a single training session just confuses the AI. You end up with a muddled, inconsistent model that isn't good at anything.
Think of it this way:
- Model A becomes an expert on Person A.
- Model B becomes an expert on Person B.
- Model C becomes an expert on a "retro film photography" look.
You can always combine these specialist models later when you're writing your prompts.
The secret to great results is focus. A model trained on a single, well-defined subject produces cleaner, more accurate images every time.
My Generated Images Look... Weird. How Do I Fix My Model?
First off, don't panic. Getting results that are a little "off" is a common and fixable part of the learning curve.
Your first stop should always be your training data. Go back and look at the images you uploaded. Are they sharp? Do they show a good mix of angles, lighting, and expressions? Often, just swapping out a few blurry or repetitive photos for better ones is all it takes to see a massive improvement.
If your data looks good, the next step is to tweak your prompts. A tiny change in how you describe what you want can completely change the output. Get more specific. Mention camera lenses, lighting setups, or the mood you're after. If you're still not getting what you want, retraining the model with a slightly different set of images is a powerful way to get it back on course.
Is This Going to Be Expensive?
Not like it used to be. Training the gigantic AI models that power everything from scratch can cost millions. But creating your own personalized model on top of that foundation? That’s a different story entirely.
Services like YourAIPhotographer do all the heavy technical work for you, so you don't need to buy or rent incredibly powerful computers. The cost is simply based on the processing time used to train your model, making it affordable for creators, photographers, and even small businesses. It's usually on par with a typical software subscription, but it unlocks creative possibilities that were once out of reach for most people.
Ready to build an AI that finally gets your creative vision? With YourAIPhotographer, you can train your own model in minutes and start generating incredible, photorealistic images that are 100% yours. Get started today and take back control of your creative work.