

Create AI Avatar from Photo: Easy Steps to Personalize Your Image
Learn how to create AI avatar from photo easily. Follow this simple guide to generate your personalized AI avatar quickly and effortlessly.
Table of Contents
Turning a handful of your favorite selfies into a stunning AI avatar is a surprisingly straightforward process. You'll start by uploading a selection of your photos to an AI generator, which then gets to work training a unique digital model that captures your likeness. From there, you can generate an incredible variety of avatar styles. This whole process uses generative AI to transform everyday pictures into images that look like they came from a professional photo shoot—perfect for just about anything online.
What Are AI Avatars and Why Are They Popular
At its heart, an AI avatar is simply a digital version of you, created by artificial intelligence. But it's so much more than a static profile picture. Think of it as a dynamic digital persona. You could create a sharp, photorealistic headshot for your LinkedIn profile, a stylized character for your gaming accounts, or even an animated version to use in marketing videos.
The technology is pretty amazing. It blends sophisticated algorithms with your own photos to create something completely new. If you're curious about how AI is shaking up the world of digital imagery, you can learn more about the role of AI for photography.
The concept of a digital representation isn't new, of course. Early computer games used simple pixelated characters to represent players.
Looking at an old-school avatar really puts into perspective how far we've come—from those basic characters to the incredibly realistic AI-generated images we can create today.
The Technology Fueling the Trend
So, how does this all work? Creating an AI avatar from a photo hinges on generative AI and machine learning. When you upload your pictures, the AI model doesn't just slap a filter on them. It meticulously analyzes your unique facial features—your eye shape, the structure of your nose, your smile—to build a comprehensive digital model. It’s essentially teaching an AI what you look like from every possible angle.
The explosive growth of this technology is hard to ignore.
According to a MarketsandMarkets report, the AI avatar market is projected to jump from USD 0.80 billion in 2025 to a massive USD 5.93 billion by 2032. That’s a compound annual growth rate (CAGR) of 33.1%, which shows just how quickly this tech is being adopted everywhere. You can read more about the AI avatar market on PR Newswire.
Why Everyone Is Making AI Avatars
Why has this trend completely taken off? It really comes down to a mix of versatility and accessibility. Not long ago, getting a professional headshot or a creative portrait meant hiring a photographer, booking studio time, and spending a good amount of money. Now, you can generate an endless supply of high-quality images right from your couch.
Here’s a quick rundown of why they’ve become a go-to for so many people:
- Personal Branding: It's a game-changer for professionals. You can create a polished, consistent look for your headshots across LinkedIn, company websites, and conference speaker profiles.
- Social Media: In a sea of endless content, AI avatars help influencers and everyday users create profile pictures that stop the scroll and make their posts stand out.
- Creative Expression: It’s a fantastic outlet for artists and hobbyists. You can reimagine yourself as anything from a fantasy hero to a futuristic cyborg.
- Privacy: For those who want an online presence without using an actual photo, avatars provide a great middle ground, adding a comfortable layer of privacy.
Before we dive into the step-by-step process, let's break down the journey from photo to avatar.
AI Avatar Creation At a Glance
Here’s a quick summary of the key stages for transforming your photo into a personalized AI avatar.
| Stage | Key Action | Why It Matters |
|---|---|---|
| 1. Photo Upload | Uploading 10-20 high-quality, varied photos. | The AI needs diverse data (angles, lighting, expressions) to learn your face accurately. |
| 2. Model Training | The AI analyzes your facial features. | This creates a unique digital model of you, which is the foundation for all avatars. |
| 3. Avatar Generation | Applying styles and prompts to the model. | This is the creative part where you generate different looks, from professional to fantasy. |
This table gives you a bird's-eye view of the entire process. Now, let’s get into the specifics of each stage.
Choosing the Right Photos for Your AI Model
The quality of your AI-generated avatars hinges entirely on the photos you feed the model. It's simple, really: garbage in, garbage out. Think of it as giving a portrait artist a stack of reference photos—the better and more varied they are, the more the final painting will actually look like you.
I see it all the time: people upload a dozen selfies from the same angle, taken on the same day, and then wonder why their avatars look so flat and lifeless. You're starving the AI of the information it needs to understand your face from all sides. To get truly impressive results, you need to provide a complete picture of what you look like.
The Core Principles of Photo Selection
If you want to create an AI avatar from a photo that's a dead ringer for you, variety is the name of the game. The AI needs to learn your unique features under different conditions, not just how you look in your favorite selfie pose.
Your goal is to gather between 10 to 20 photos. This is the sweet spot—enough data for the AI to learn from, but not so many that you're just adding redundant images. What matters most is what's in those photos. You'll want a healthy mix of close-ups, shots from the chest up, and a couple of side profiles.
Here's a quick checklist for building a great training set:
- Different Angles: Make sure you have photos looking straight on, from a three-quarter view, and in profile. This helps the AI build a 3D understanding of your face.
- Varied Expressions: Don't just upload smiling pictures! Mix in some neutral expressions, maybe a thoughtful look, or even one of you laughing.
- Diverse Lighting: Include photos from different environments. Some in bright, natural daylight and others in softer, indoor lighting will show the AI how shadows and light interact with your features.
A quick pro-tip from experience: The single biggest mistake is using photos from just one photoshoot. An AI model trained on that will spit out repetitive, one-dimensional avatars. Pull photos from different days, times, and places for the best results.
Common Pitfalls to Avoid
Knowing what not to upload is just as crucial as knowing what to include. Certain images will actively confuse the AI and lead to some pretty strange-looking results. Getting this right from the start will save you a ton of headaches later.
Here are the main things you should leave out of your photo set:
- Sunglasses and Hats: Anything that covers up your eyes, hairline, or the shape of your face is a no-go.
- Heavy Filters or Editing: Instagram filters might look cool, but they alter your core features. The AI needs to learn the real you, not the filtered version.
- Group Photos: This one’s a big one. Never use a photo with other people in it. The AI won't know which face to focus on.
- Low-Resolution Images: If a photo is blurry or pixelated, the AI can't see the fine details it needs to create a realistic avatar.
Taking a few extra minutes to curate your photos is the most important part of this whole process. It’s the foundation for everything that comes next. If you want to explore this topic more, we have a detailed guide on how to make AI images of yourself. A little prep work here makes all the difference.
Training Your Personalized AI Avatar Model
Alright, you've gathered your best photos. Now for the fun part: actually training your own personal AI model. This is where the magic happens. The platform will take all those images you uploaded and essentially create a unique digital blueprint of your face. It's how you create an AI avatar from a photo that genuinely looks like you.
Think of it like this: the AI is an artist studying your face from every possible angle before it even picks up a brush. It's learning the specific geometry of your features, the way light and shadow play across your skin, and all the little details that make you, you. It's not just a copy-and-paste job.
This whole process turns your static photos into a dynamic model that the AI can use to generate brand-new images.
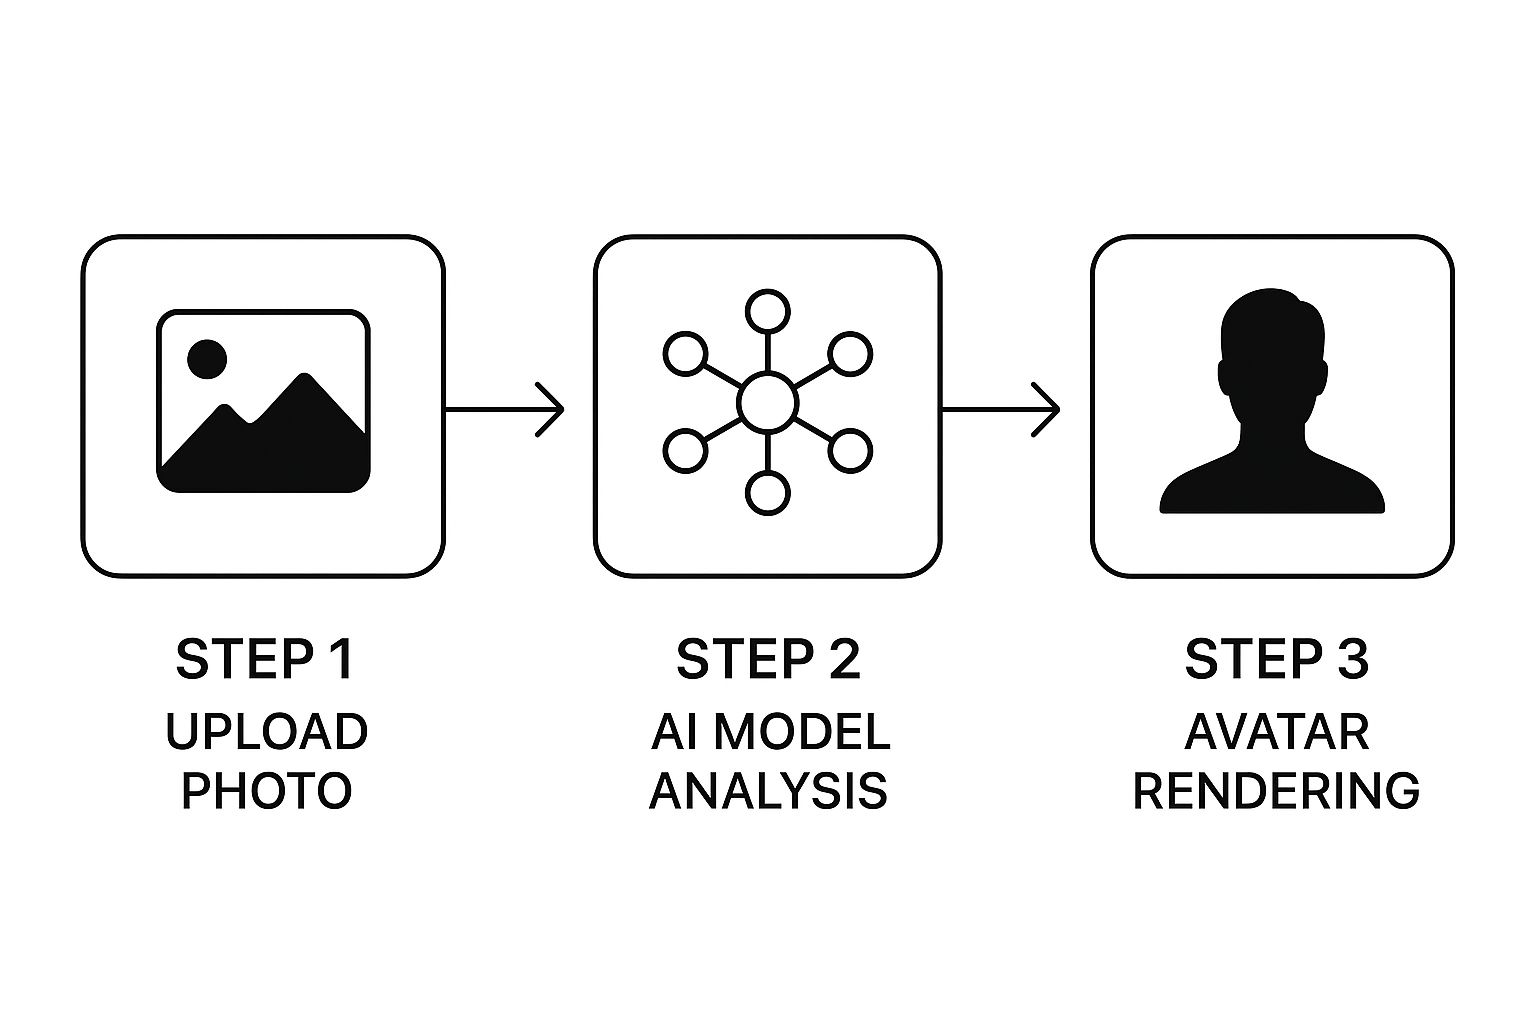
The image above breaks it down visually: your photos go in, the AI does its thing, and out comes a custom model ready to create your avatars.
Kicking Off the Training
Once you're ready to start, you'll find that most AI avatar generators keep things simple. You'll usually just see a big "Upload" button and then something like "Start Training" or "Build My Model." The whole point of these tools is to hide the complexity, so don't let any of it intimidate you.
Your main responsibility was providing great input photos. Now, the AI takes over. It handles all the heavy lifting in the background, building a complex model from the data you gave it. While some pro-level tools might give you knobs and dials to fiddle with, most platforms designed for everyday users automate this step completely.
If you're curious about the nitty-gritty of what's happening behind the curtain, we've put together a full guide on how to train an AI model that goes much deeper.
How Long Will This Take?
This is a good time to grab a coffee, because training an AI model isn't instant. The wait time can swing quite a bit depending on a few things:
- Server Load: If a ton of people are training models at the same time, you'll be in a queue. It’s just like waiting in line at a popular restaurant.
- AI Sophistication: A more advanced AI that captures finer details will naturally take longer to process everything.
- Photo Count: More photos can sometimes mean a slightly longer processing time, but it's usually worth it for the improved accuracy.
In my experience, you should plan for the training to take anywhere from 20 minutes to over an hour. The good news is you don't have to stare at the screen. Nearly every service will shoot you an email the second your model is ready.
Expert Tip: Don't get impatient. That waiting period is crucial. A rushed training job often results in a sloppy model and avatars that just feel... off. The time the AI spends now is what allows it to create those incredibly realistic images later.
Once that "Your model is ready!" email lands in your inbox, you're all set. You now have a unique digital version of yourself, trained exclusively on your face. This model is the foundation for every single avatar you're about to create.
Bringing Your Avatars to Life
Alright, your personalized model is trained and ready to go. Now the fun really starts. This is where you get to play director, using simple text commands—or "prompts"—to tell the AI exactly what kind of avatar you want it to create. You can literally transform your digital self into any style or setting you can imagine.
Think of it this way: the AI is your actor, and your prompt is the script. If you give a simple direction like, "professional headshot, smiling," you'll get a pretty standard result. But the real magic happens when you get descriptive. The more detail you provide, the more control you have over the final image.
The Art of a Great Prompt
Crafting a good prompt isn’t about knowing code; it's about painting a picture with your words. Start with your main idea and then start layering in the details. For example, instead of just saying "fantasy character," try something like, "fantasy warrior with polished silver armor, standing in a mystical forest at dawn."
See the difference? That level of detail gives the AI clear instructions, helping it generate an image that’s much closer to what you’re picturing in your head.
To really dial in your results, try including these elements in your prompts:
- Style: Are you going for a "cinematic photo," an "anime style," or maybe a "vintage black and white portrait?" Be specific.
- Setting: Describe the background. Is your avatar "in a modern office," "on a beach at sunset," or just "against a simple gray backdrop?"
- Lighting: This one is huge. "Golden hour lighting" gives you warm, soft tones, while "studio lighting" creates a crisp, professional look.
- Mood: What feeling do you want to convey? Words like "confident," "serene," or "dramatic" can completely change the tone of the image.
The power to generate such specific, high-quality images is why these tools are becoming so popular. People want a digital identity that truly reflects who they are, and that demand for deep personalization is driving massive growth in this space.
From a Basic Idea to a Stunning Result
Let's walk through a real-world example. Say you need a new headshot for your professional profiles.
Your first attempt might be a simple prompt: Professional headshot
You'll probably get something usable, but it might feel a bit generic. Let's add some detail.
A much better prompt: Photorealistic professional headshot of a person in a business suit, smiling, in a bright modern office with a blurred background.
This revised prompt gives the AI way more to work with—the style, attire, expression, setting, and even the camera focus. The result will be far more specific and high-quality. Many of the https://youraiphotographer.com/blog/best-ai-portrait-generators are at their best when you feed them rich, descriptive prompts like this one.
I’ve personally found that adding camera-specific terms makes a world of difference. Try including "close-up shot" or "medium shot" to control the framing. It’s a simple trick that gives the final image a much more polished, intentional look.
Don't be afraid to experiment. The more you play around with different prompts and combine unusual ideas, the better you'll become at steering the AI. This process of trial and error is what will take your avatars from good to truly incredible.
Pro Tips for Photorealistic and Creative Results
Alright, now that your AI model is trained, the real fun begins. You've basically built a creative engine that knows your face, and the difference between a pretty good avatar and a jaw-dropping one all comes down to the prompts you feed it. Getting this part right is how you truly create an AI avatar from photo that makes people stop scrolling.
Don't just give the AI basic instructions. Instead of asking for a generic "headshot," start thinking like a professional photographer. Specify camera angles like "close-up shot" or "medium shot." This simple change has a massive impact on the final look and composition.
Nail the Lighting and Atmosphere
I can't stress this enough: lighting is everything when it comes to photorealism. It’s what sets the mood, creates depth, and tricks the eye into believing the image is real. Vague terms just won't work here; you have to be precise.
Here are a few of my go-to lighting prompts that consistently deliver incredible results:
- "Golden hour lighting": This gives you that warm, magical glow you see right after sunrise or just before sunset. It's fantastic for creating flattering, serene portraits.
- "Dramatic studio lighting": If you want a high-contrast, professional look with sharp, defined shadows, this is your prompt. Perfect for a powerful corporate headshot.
- "Soft, diffused natural light": This mimics the light on an overcast day, which is amazing for getting rid of harsh shadows and creating a really clean, even look.
These specific commands give the AI clear visual targets, elevating your results from generic to gallery-worthy.
Blend Styles for Unique Creations
One of the coolest things about AI is its ability to smash together concepts that would be impossible in a real-world photoshoot. Don't be shy about mixing different styles, time periods, and artistic vibes to create something that’s 100% original.
For instance, try a prompt like, "in the style of a vintage film still, cinematic lighting, wearing futuristic cyberpunk attire." You're combining three totally different ideas into one cohesive, eye-catching image. This kind of creative layering is how you can make an avatar that feels less like a digital copy and more like a piece of art.
Even with the perfect prompt, sometimes the colors can feel a little off. A quick touch-up after the image is generated can make all the difference. For those times, knowing a bit about photo editing is a huge help. You can get started with our expert advice on color correction for photos to add that final professional polish.
Troubleshooting Common Issues
Even the best of us run into weird results now and then—slightly distorted features or a likeness that’s just a bit off. This usually means the prompt was too complex or conflicted with the photos you used for training. If you see strange hands or funky eyes, your first move should be to simplify your prompt.
Try removing one or two of the descriptive elements and generating the image again. You’ll often find that a slightly less ambitious prompt produces a much cleaner and more accurate result. It's all about iteration. Small tweaks can lead to huge improvements.
The flexibility of AI avatars is exactly why they're being adopted everywhere. The global AI avatar market is projected to hit an incredible USD 63.5 billion by 2034, a massive jump from USD 2.5 billion in 2024. This highlights just how much potential they have in everything from marketing to customer service. You can learn more about the growth of the AI avatar market on Market.us.
Got Questions About AI Avatars? I've Got Answers
When you first dive into creating an AI avatar from your photos, a few questions are bound to come up. It's a new process for most people, but getting your head around it is easier than you think. Let’s walk through some of the most common things people ask, from picking the right pictures to what to do when the results feel a little... strange.
This is your go-to guide for clearing up any confusion. I'll share some practical advice to help you get the hang of it and troubleshoot any snags you might hit.
So, How Many Photos Should I Actually Use?
The sweet spot is usually between 10 and 20 high-quality photos. But honestly, the number itself isn't the magic ingredient—variety is. You’ll get far better results from a diverse set of pictures than you will from 20 selfies that all look the same.
To give the AI the best possible chance to learn your face, make sure your photo collection includes:
- Different Angles: Mix in shots from the front, your profile, and three-quarter views. This helps the AI build a more complete, 3D-like understanding of your facial structure.
- A Range of Expressions: Don't just stick to your standard smile! Toss in a few pictures with a neutral look, some where you're laughing, and maybe a few other candid emotions.
- Varied Lighting Conditions: It's a great idea to include photos taken in bright, natural daylight as well as some in softer, indoor light. This teaches the AI how light and shadows play across your features.
The more varied the information you feed the model, the better it can grasp what makes you look like you. This is what leads to those really convincing, versatile avatars.
A little pro-tip from my own experience: The biggest mistake I see people make is grabbing all their training photos from the same photoshoot. When the AI only sees you in one setting with one type of lighting, it tends to spit out really repetitive, flat-looking avatars. The secret to getting dynamic results is to pull photos from different days, times, and places.
Is It Really Safe to Upload My Pictures?
This is a big one, and it's a totally valid concern. Any trustworthy AI avatar service knows how important your privacy is and should be upfront about how they handle your data. At the end of the day, your photos should only ever be used for one thing: training your personal AI model.
Before you upload anything, always take a minute to review the platform's privacy policy. You're looking for clear, direct language confirming that your images won't be sold, shared, or used for anything else. Many of the top-tier services also automatically delete your photos and the trained model after a certain amount of time, often around 30 days, which adds another layer of protection. This way, you know your personal data isn't just sitting on a server forever.
Why Do My Avatars Sometimes Look a Bit... Weird?
It can definitely be a little jarring when an avatar comes out looking not quite like you. This usually boils down to a couple of key things. More often than not, the culprit is the quality and variety of the photos you used for training. If the pictures were too similar, blurry, or had heavy filters, the AI will have a tough time picking up on the little details that define your face.
It's also worth remembering that some avatar styles, like anime or fantasy art, are meant to be artistic interpretations, not photorealistic copies. If you're aiming for a closer likeness, the best first step is to retrain the model with a better, more diverse set of photos. You can also try generating new images with different, more specific text prompts to nudge the AI in the right direction.
Ready to create some incredible, photorealistic avatars for yourself? With YourAIPhotographer, you can train your own AI model in minutes and generate all the high-quality images you want. It’s time to ditch the generic profile pictures and build a digital identity that’s actually you. Give it a try!